Mass Deployment options are only available for Ditto Premium and Elite plans. Ditto Basic plans can be upgraded in the Billing section of your Ditto Account Portal.
This guide allows Ditto and Cisco Meraki administrators to zero-touch deploy the Ditto tvOS Receiver across multiple supervised Apple TVs simultaneously.
- Step 1 - Preconfigure Cisco Meraki in Ditto
- Step 2 - Deploy Ditto Receiver in Cisco Meraki
- Step 3 - Link Devices to Rooms in Ditto
- Step 4 - Disable Airplay
The instructions below assume:
Your Apple TVs are already enrolled in Cisco Meraki and Supervised
You've correctly configured your network for use with Ditto
Deploying Large Numbers of Receivers?
Parts of this process can be automated even further. Please contact your Ditto account representative for additional Cisco Meraki deployment options.
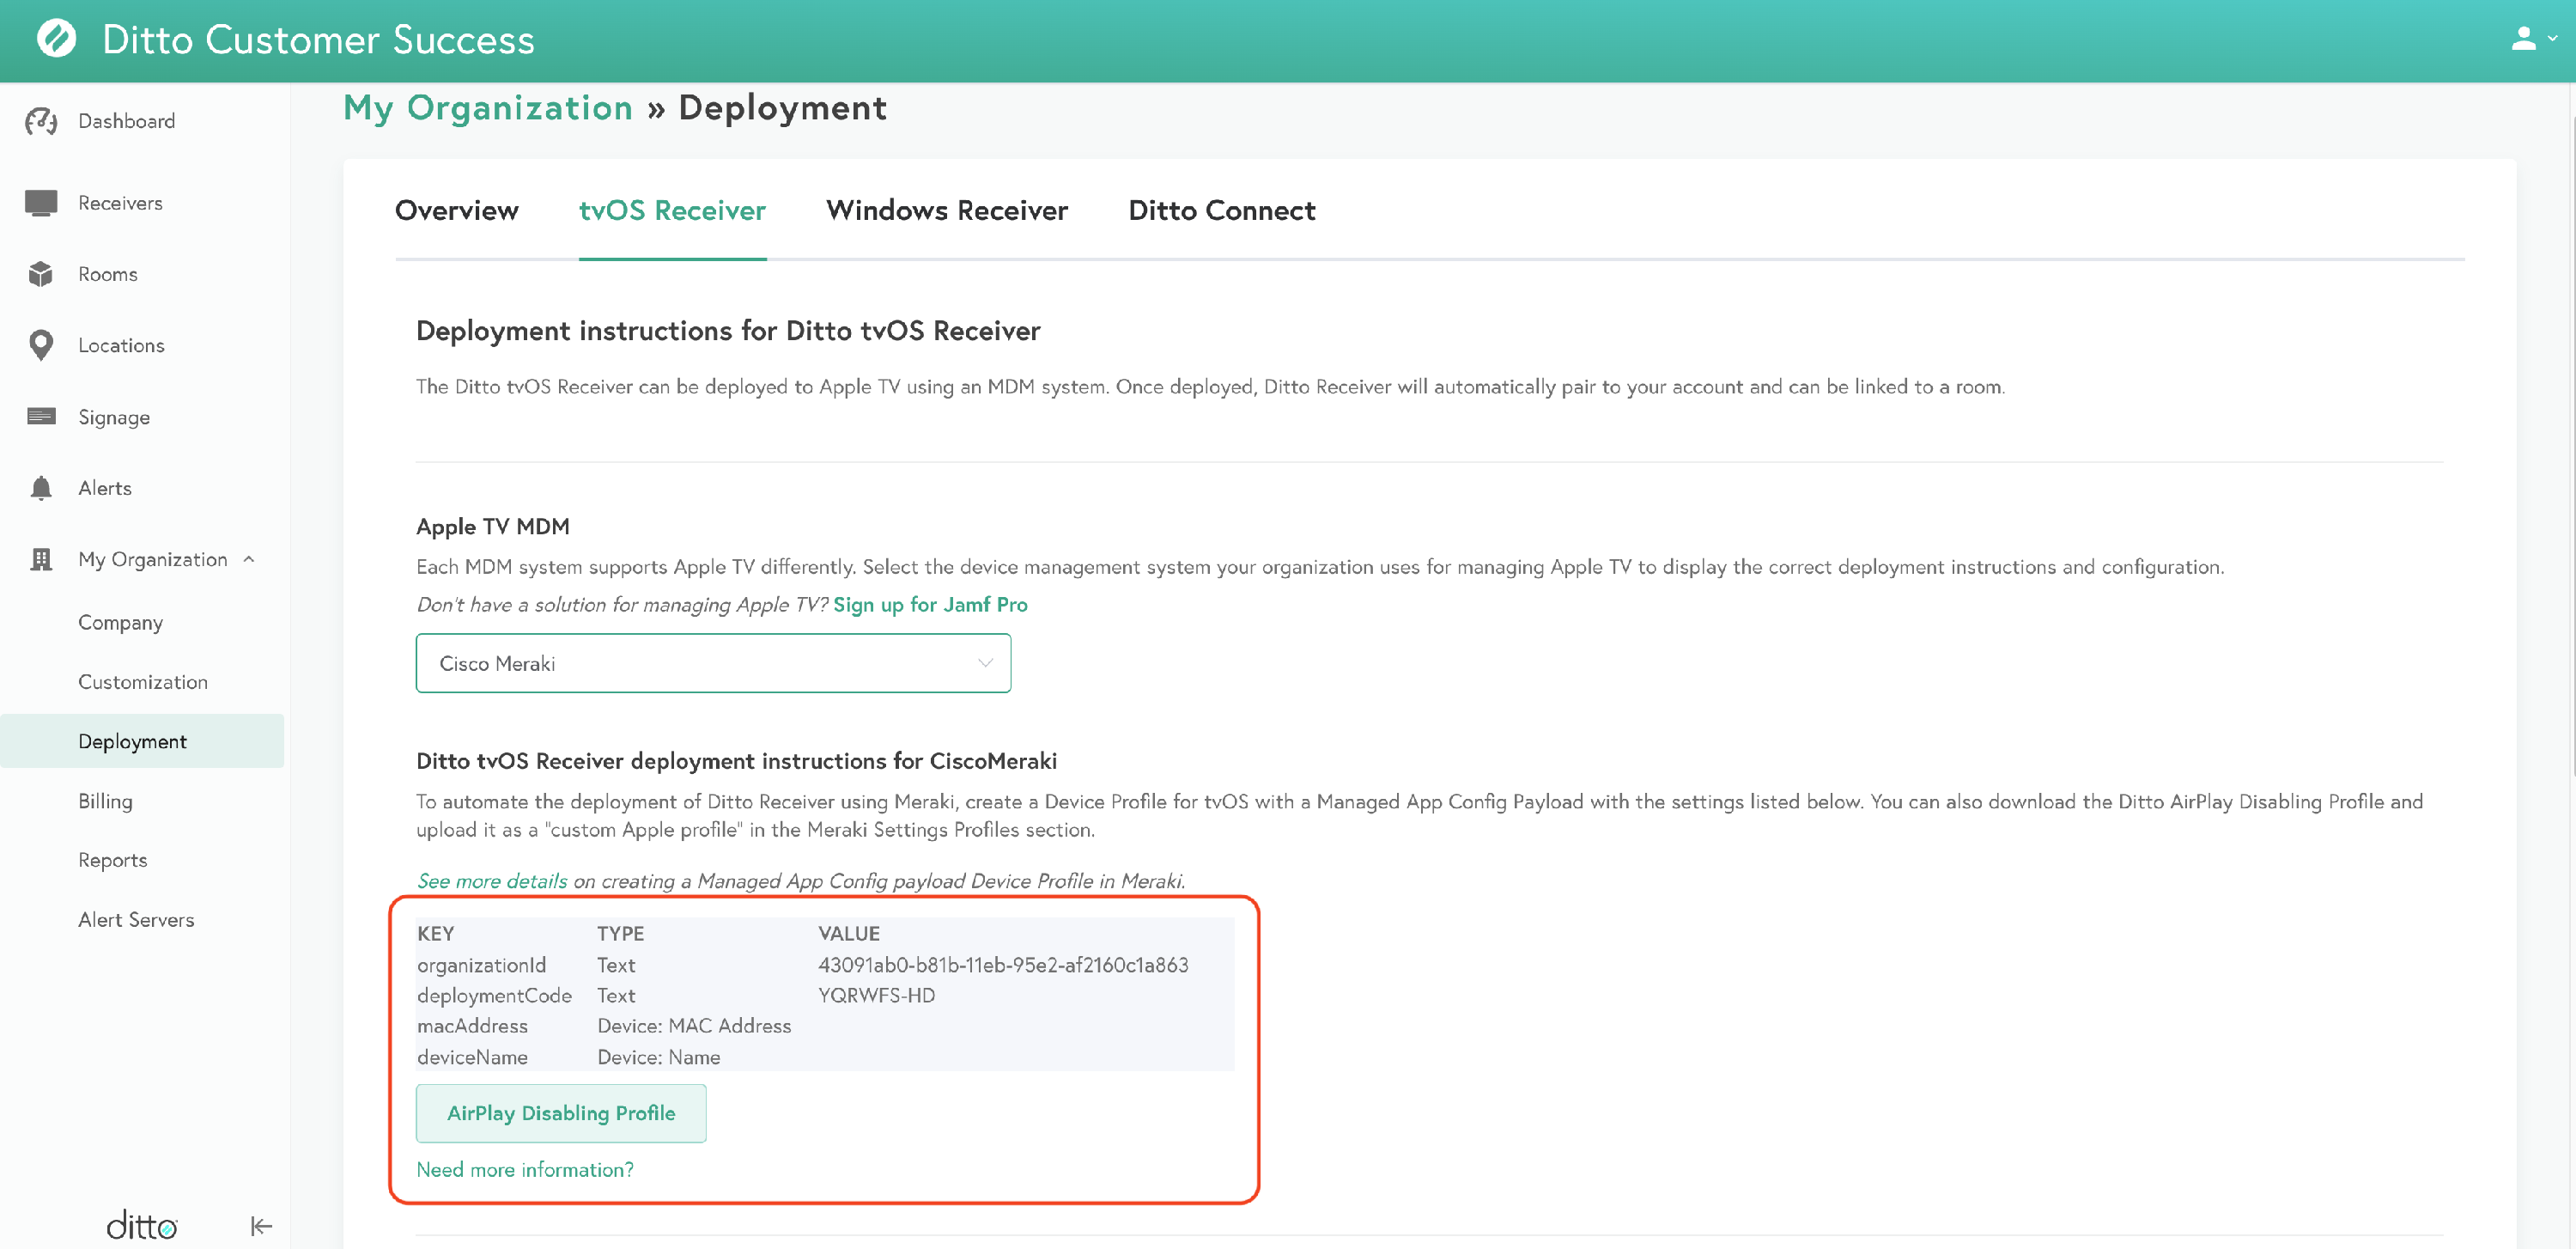
Step 1 - Preconfigure Cisco Meraki in Ditto
- Log in to the Ditto Account Portal
- Navigate to the My Organization area
- Select "Deployment"
- Select the "Ditto tvOS Receiver" tab
- Select "Cisco Meraki" from the Apple TV MDM type options
- Note the configuration settings that appear. It may be helpful to keep this page open, as you will need this information in the following steps.
Step 2 - Deploy Ditto tvOS Receiver in Cisco Meraki
- Log in to your Cisco Meraki portal
- Mouseover "Systems Manager" and then choose “Apps” under Manage
- Select "+ Add app" at the top right of the screen
- Select "tvOS"
- Select "App Store app"
- Click "Next"
- Search for "Ditto Connect" and select it when it appears
- Ensure “Auto-install / auto-uninstall” is checked
- Select the appropriate scope for your Apple TVs
- Press "Save"
- In the navigation pane, mouseover "Systems Manager" and then choose “Settings” under manage
- Click the “+ Add Profile” at the top right
- Select "Device Profile" (default)
- Click "Continue"
- Provide a name for the profile configuration such as “Ditto Receiver Settings”
- Choose the appropriate scope for your Apple TV devices
- In the left column, choose “Add Settings”
- Click the “tvOS” device type to filter the available options
- Choose “Managed App Config”
- Select "tvOS" as the platform
- Select "Ditto Receiver" from the app dropdown
- Enter the settings displayed in your Ditto Account Portal from the end of step one above exactly as they're displayed. If the fields are incomplete, missing, or incorrect, your receivers will not pair with your Ditto account.

- In the left column, choose “Add Settings”
- Click the “tvOS Device Type" to filter the available options
- Select "Single App Mode" (Kiosk)
- Set the device type to “tvOS”
- Select "Ditto Receiver" for the app
- Click "Save"
It may take a few minutes for these settings to propagate across your devices.
Step 3 - Link Devices to Rooms in Ditto
At this point, your Apple TVs are now configured and paired to your Ditto account. You now need to link each receiver to a room.
- Return to the Ditto Account Portal
- Navigate to the Rooms section
- Create a room for each receiver you added through Cisco Meraki
- Ditto is now ready to use with your Apple TV. Users can now mirror their screens using Ditto Connect.
- Return to the Ditto Account Portal
- Navigate to the My Organization section
- Select Deployment
- Click the Ditto tvOS Receiver tab
- Under Quick Link Rooms, select Begin Linking and you will be presented with a list of unlinked receivers added through Cisco Meraki
- Select the room each receiver should be assigned to from the drop down beside the receiver name
Step 4 - Disable AirPlay
Pro-Tip:
Disabling AirPlay on Apple TVs running Ditto Receiver enhances security by preventing users from using AirPlay to interrupt an in-progress mirroring session. Disabling AirPlay also alleviates mDNS concerns on the network and provides one simple way for all users to share their screens, regardless of device.
- Login to the Ditto Account Portal
- Navigate to the My Organization area
- Select "Deployment"
- Select the "Ditto tvOS Receiver" tab
- Download the AirPlay Disabling Profile (This option only appears if you've selected Cisco Meraki as your MDM Provider)
- Log in to your Cisco Meraki portal
- In the navigation pane, mouseover "Systems Manager" and then choose “Settings” under manage
- Click the “+ Add Profile” at the top right
- Select "Upload custom Apple profile"
- Click "Continue"
- Click the "Upload a .mobileconfig file" link
- Upload the file downloaded from your Ditto Account Portal above
- Select the scope for your Apple TVs
- Click "Save"