Scheduling digital signage lists and items in the Ditto Account Portal can be completed in a few clicks. You may apply Ditto scheduling options to entire signage lists or individual signage items.
- Scheduling options
- Schedule a signage list
- Schedule multiple or individual signage items
Scheduling options include:
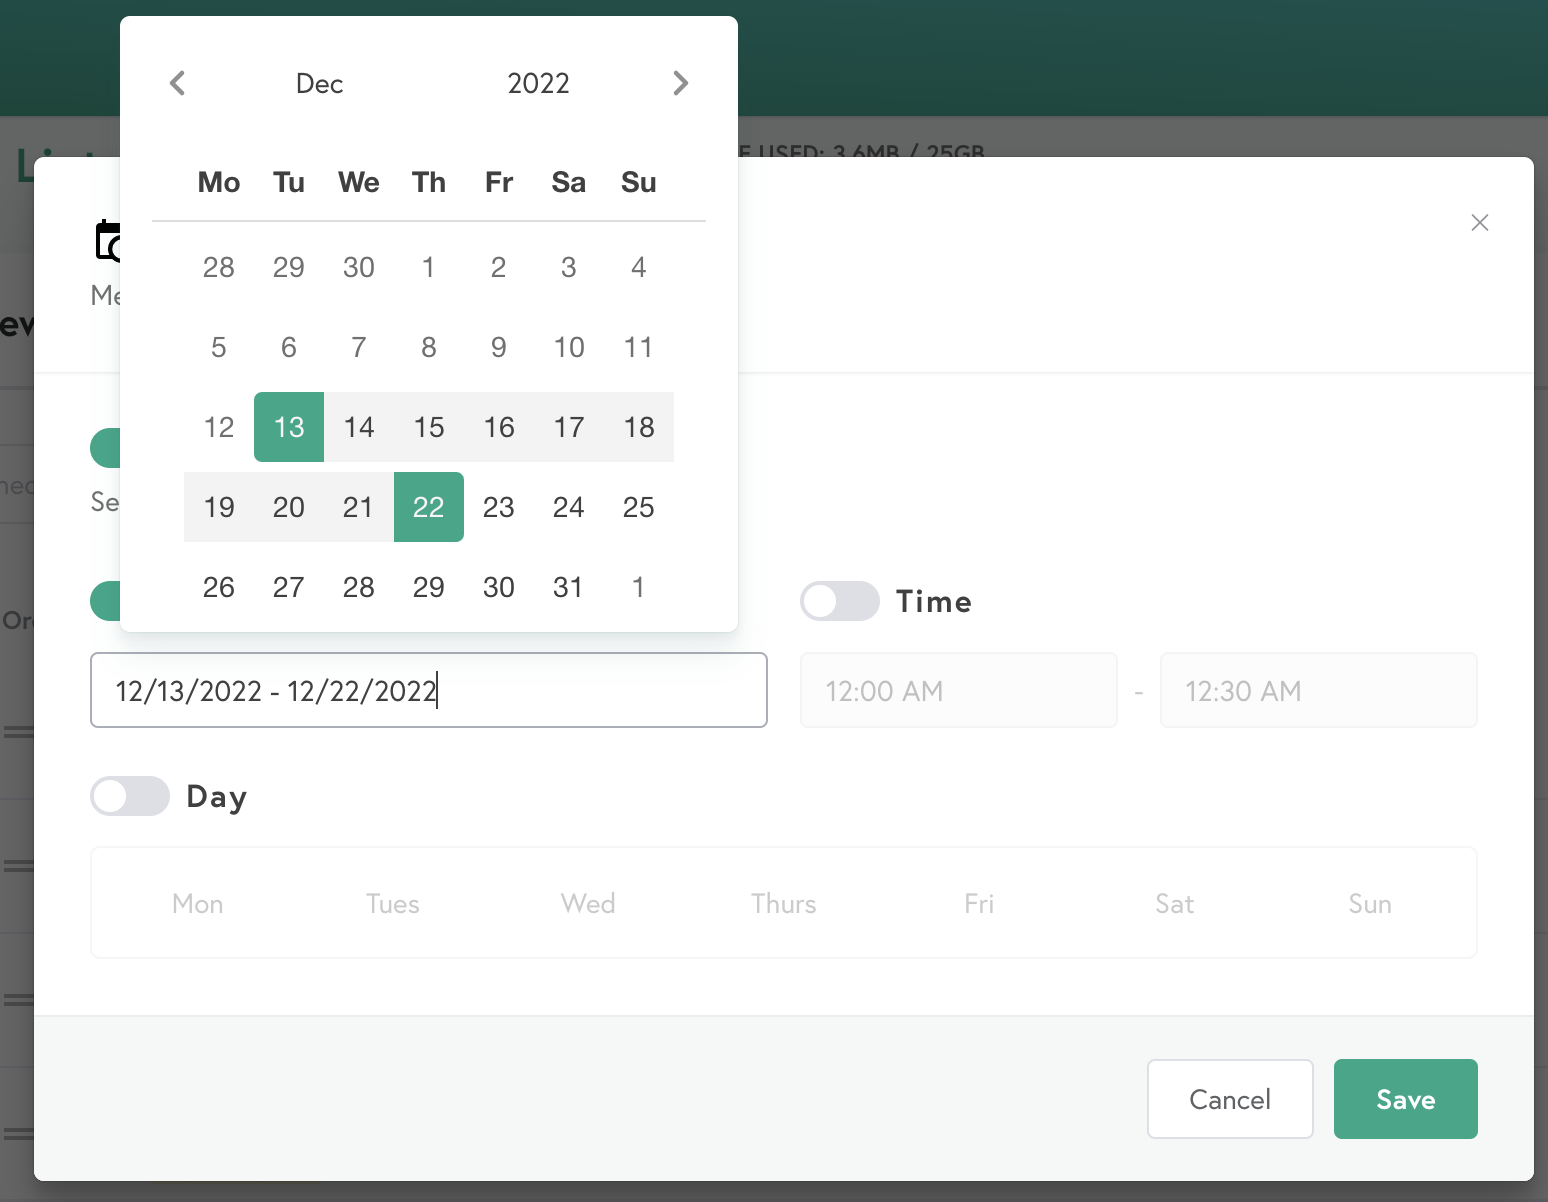
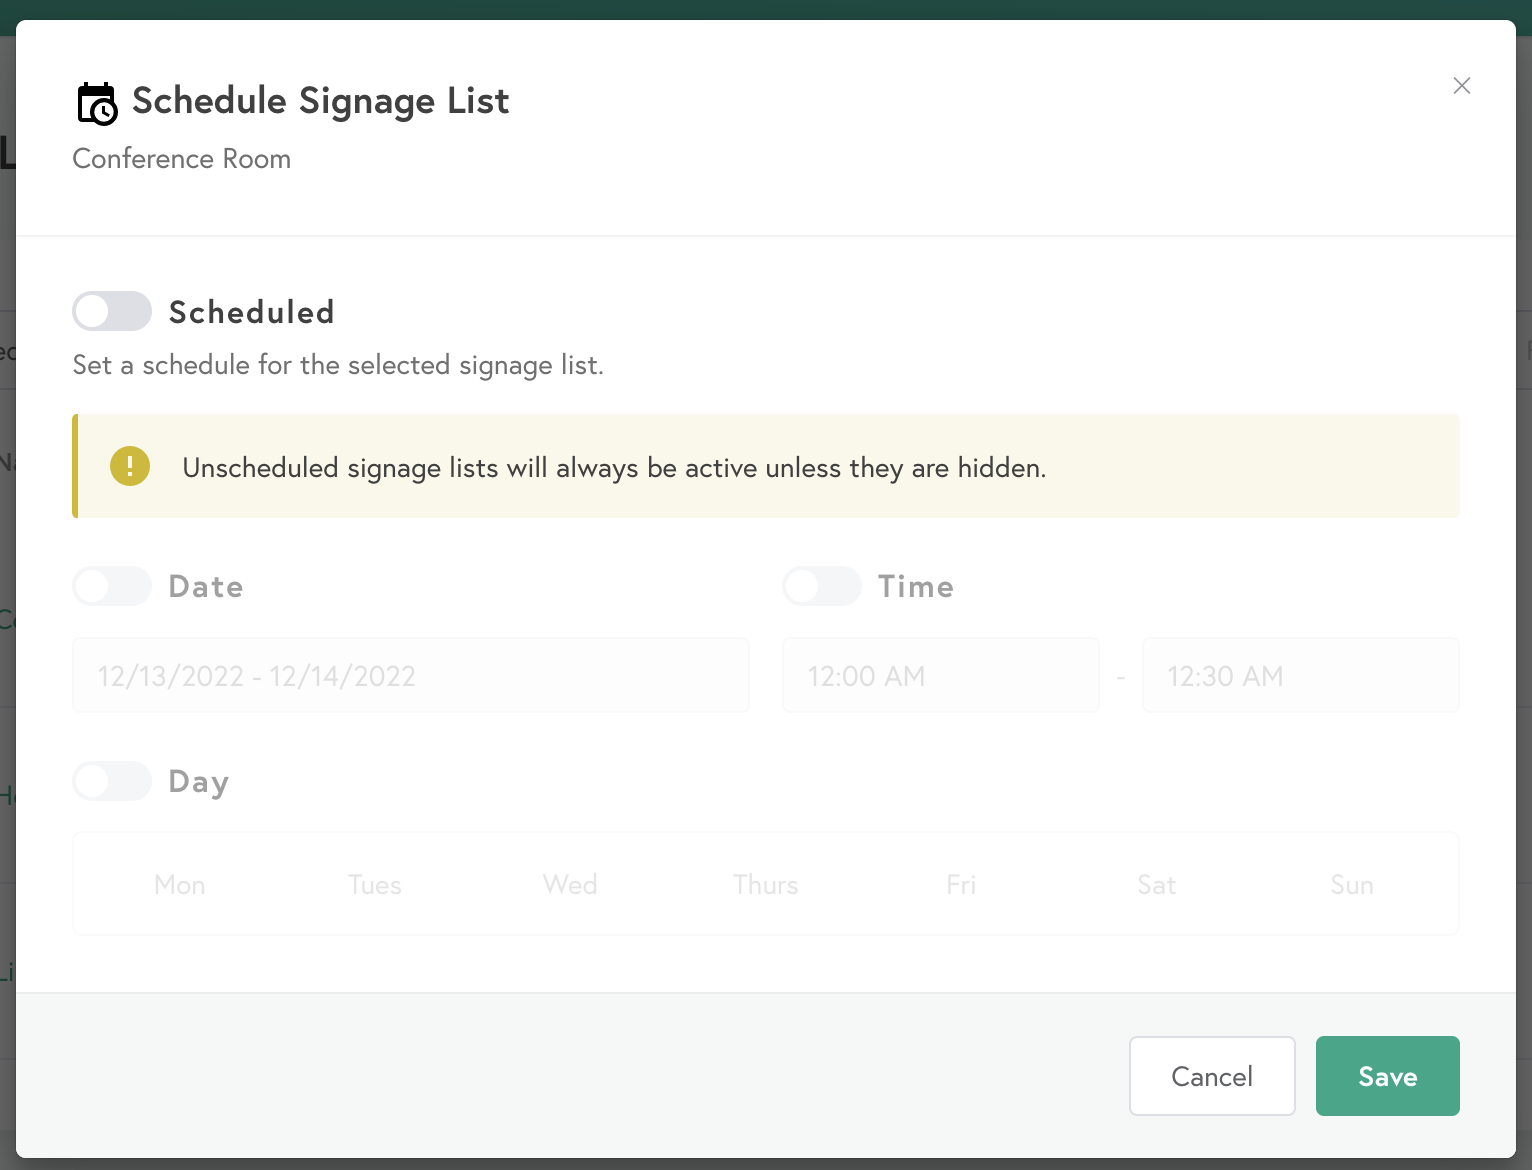
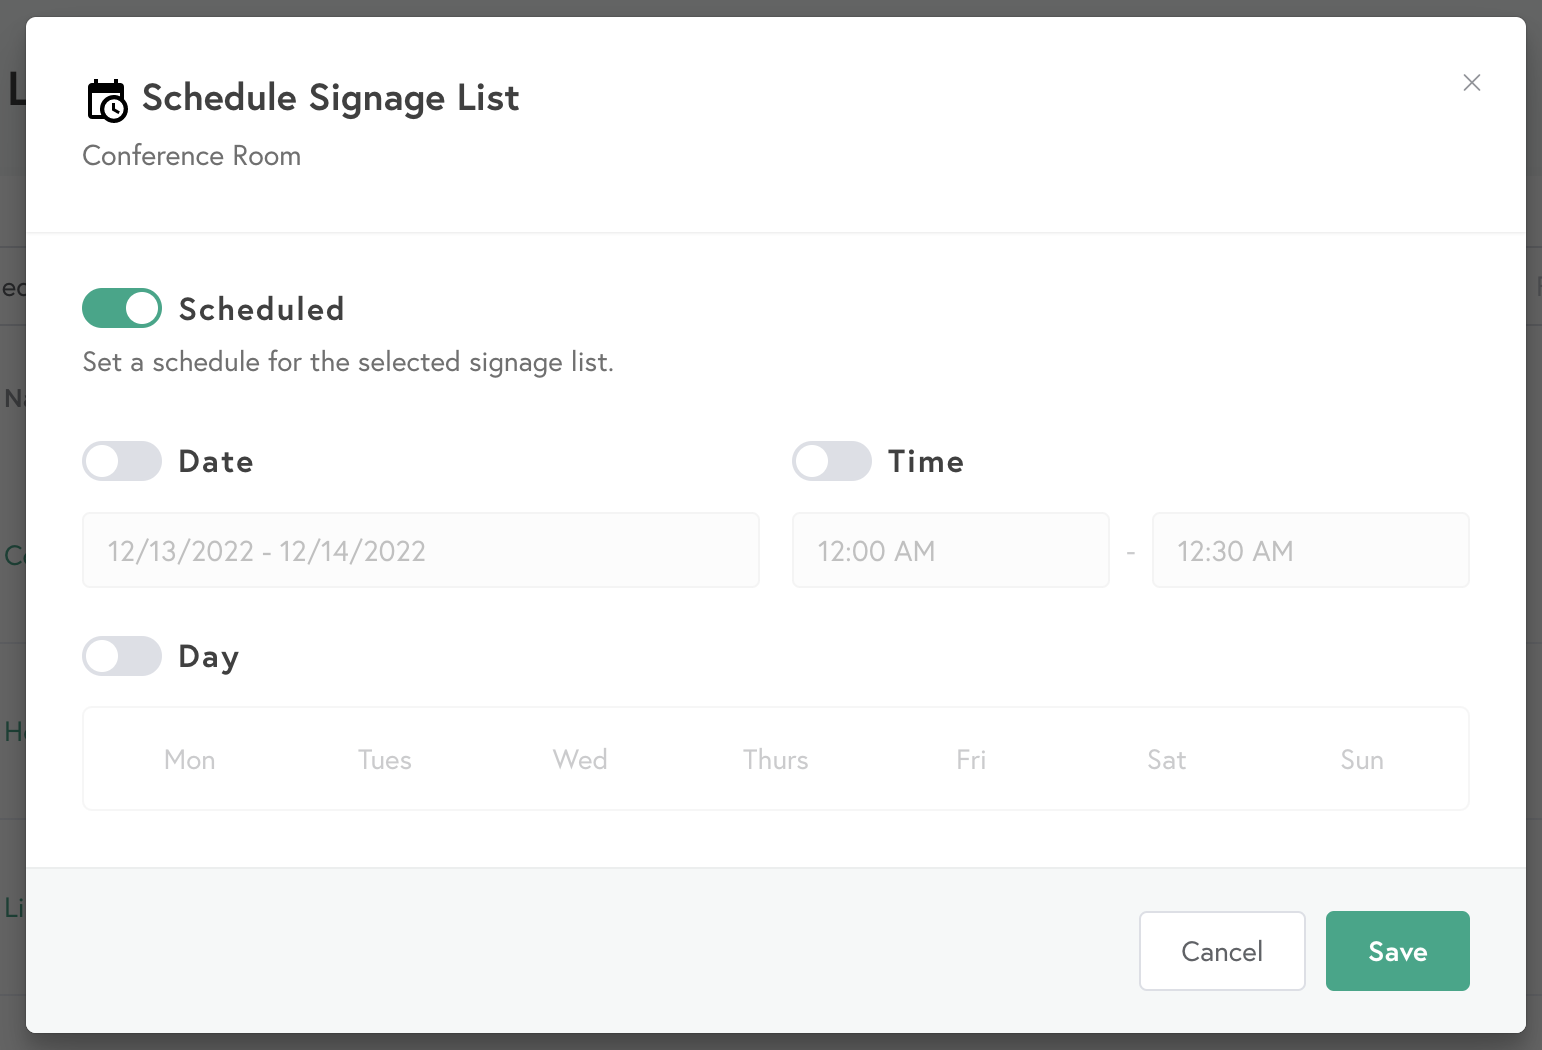
- Date / Date Range
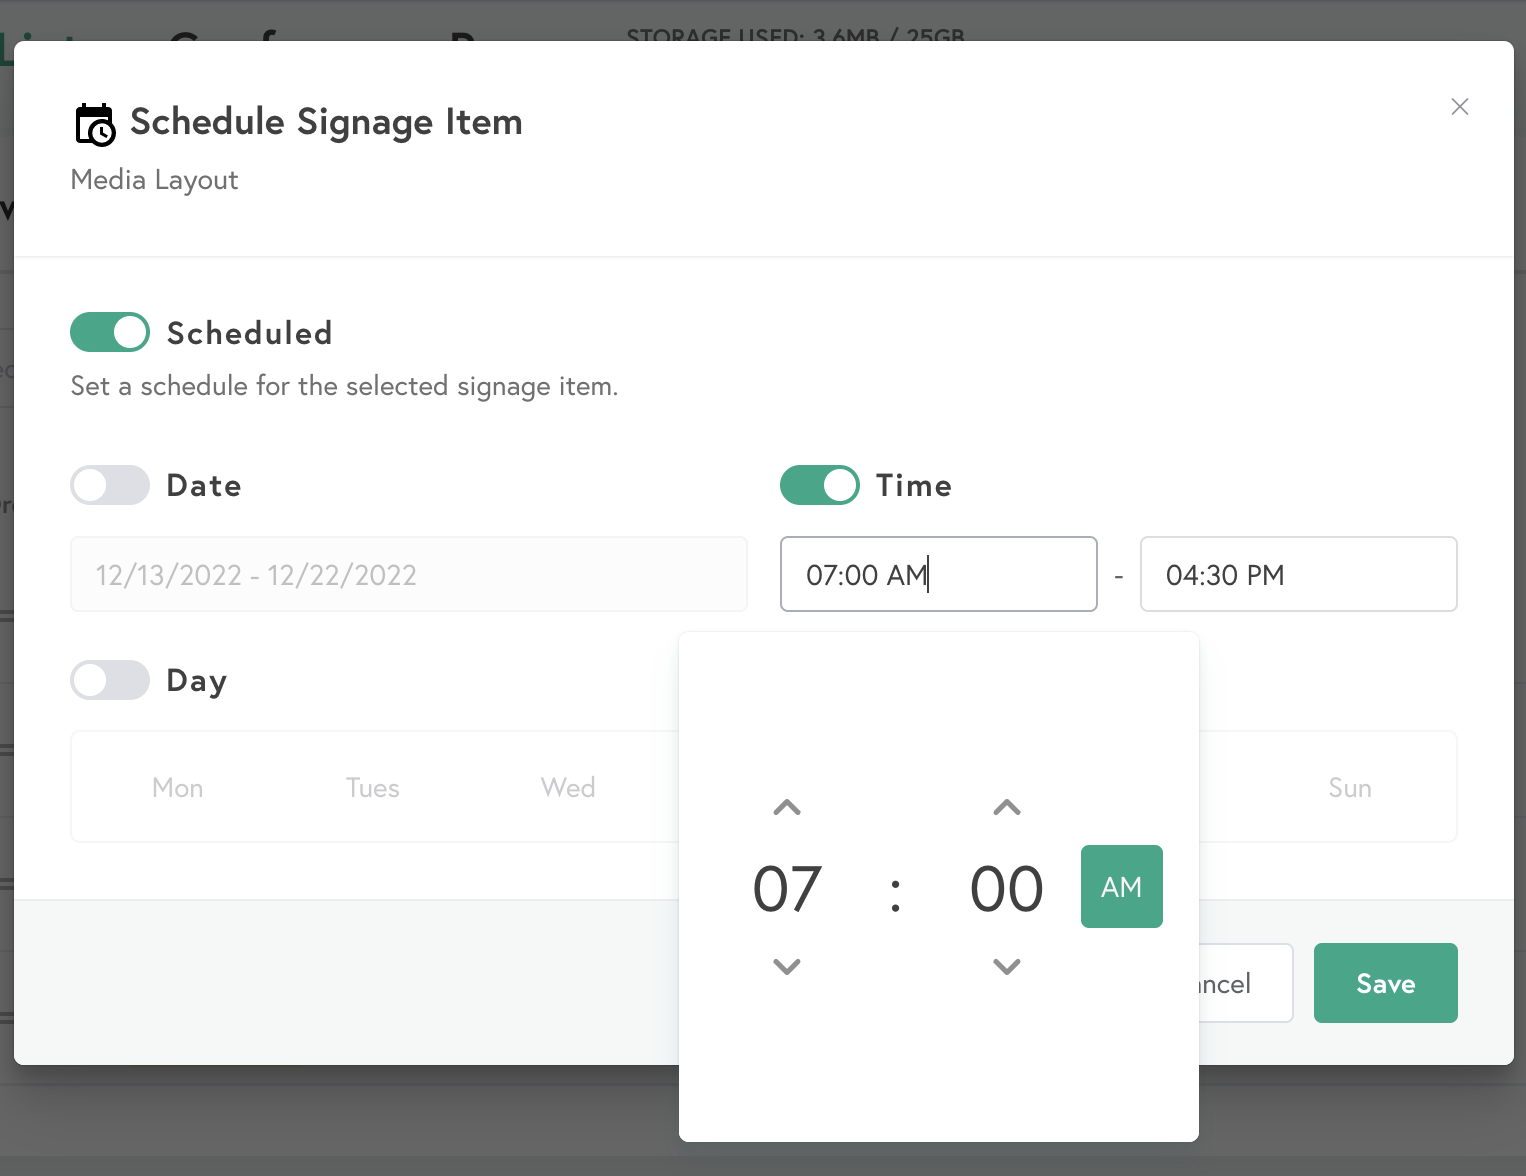
- Time
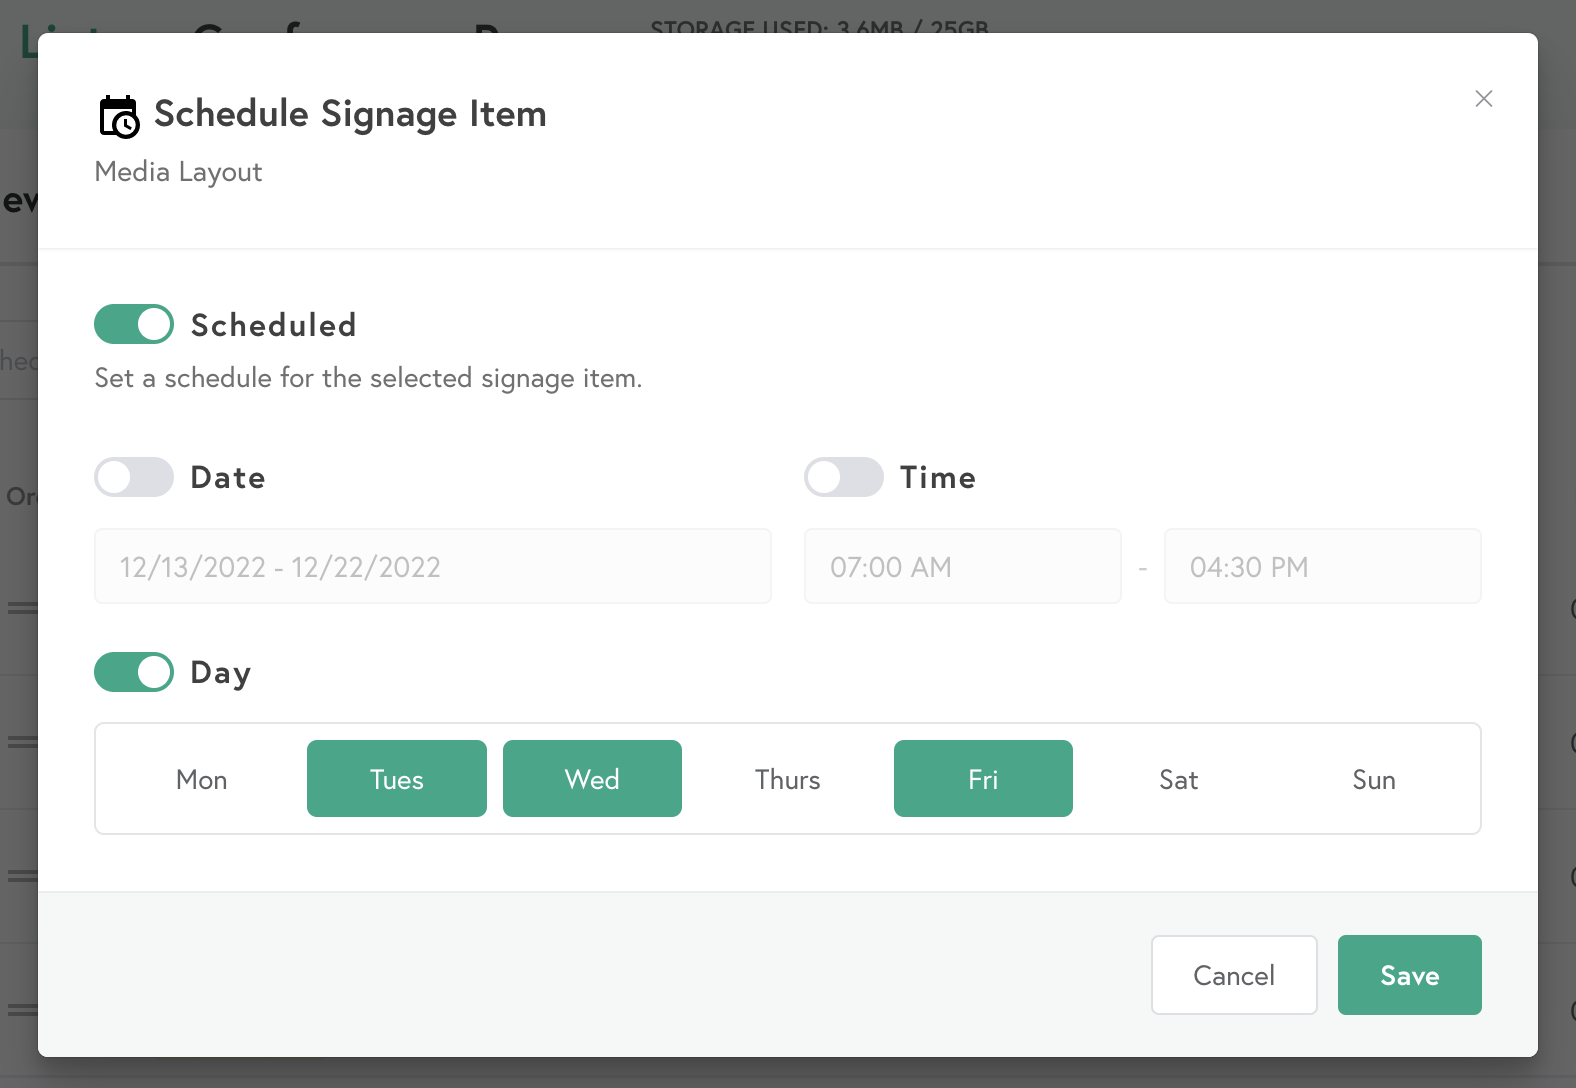
- Day(s)
Date / Date Range - Using "Date" to schedule lists or individual items allows you to display the selected lists or items during specific calendar dates. When this function is enabled, you have the option to select a single date or date range to show lists or items on your Ditto receiver-enabled screens.
Time - using "Time" for scheduling lists or individual items allows you to display the selected lists or items during specific times of the day. When this function is enabled, you have the option to select the start and stop time for lists or items on your Ditto receiver-enabled screens.
Day - Using "Day" for scheduling lists or individual items allows you to display the selected lists or items during the selected day(s) of the week. When this function is enabled, you have the option to select any combination of days to display the lists or items on your Ditto receiver-enabled screens.
Note:
- These scheduling options can be used individually or in combination.
- Due to the tiered nature of scheduling, any scheduling feature enabled for signage lists will take precedence over scheduling features enabled for individual signage items.
- Scheduling your Ditto digital signage lists or items is truly customizable when using the scheduling features, and it is possible to schedule individual items within a scheduled list.
The instructions below explain how to set up schedules for your Ditto digital signage lists and items.
Schedule a signage list
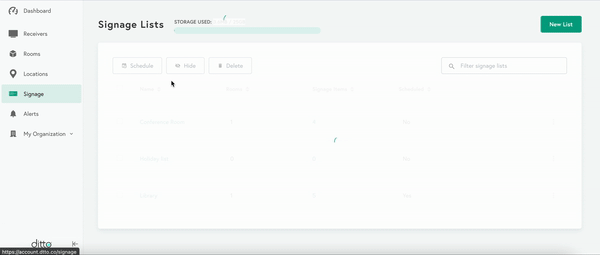
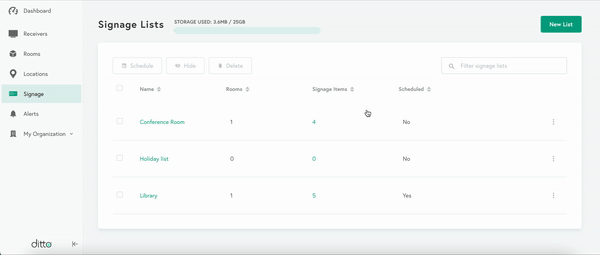
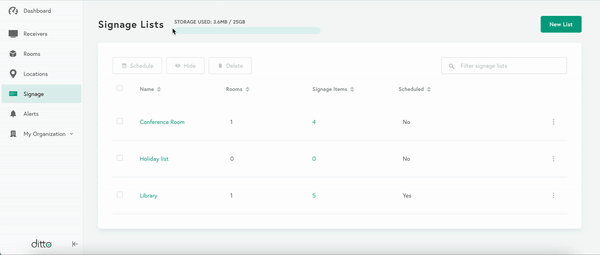
Step 1: Log into the Ditto Account Portal and click the "Signage" tab
Step 2: Select the list you want to schedule
Option 1: Select the name of the list you wish to schedule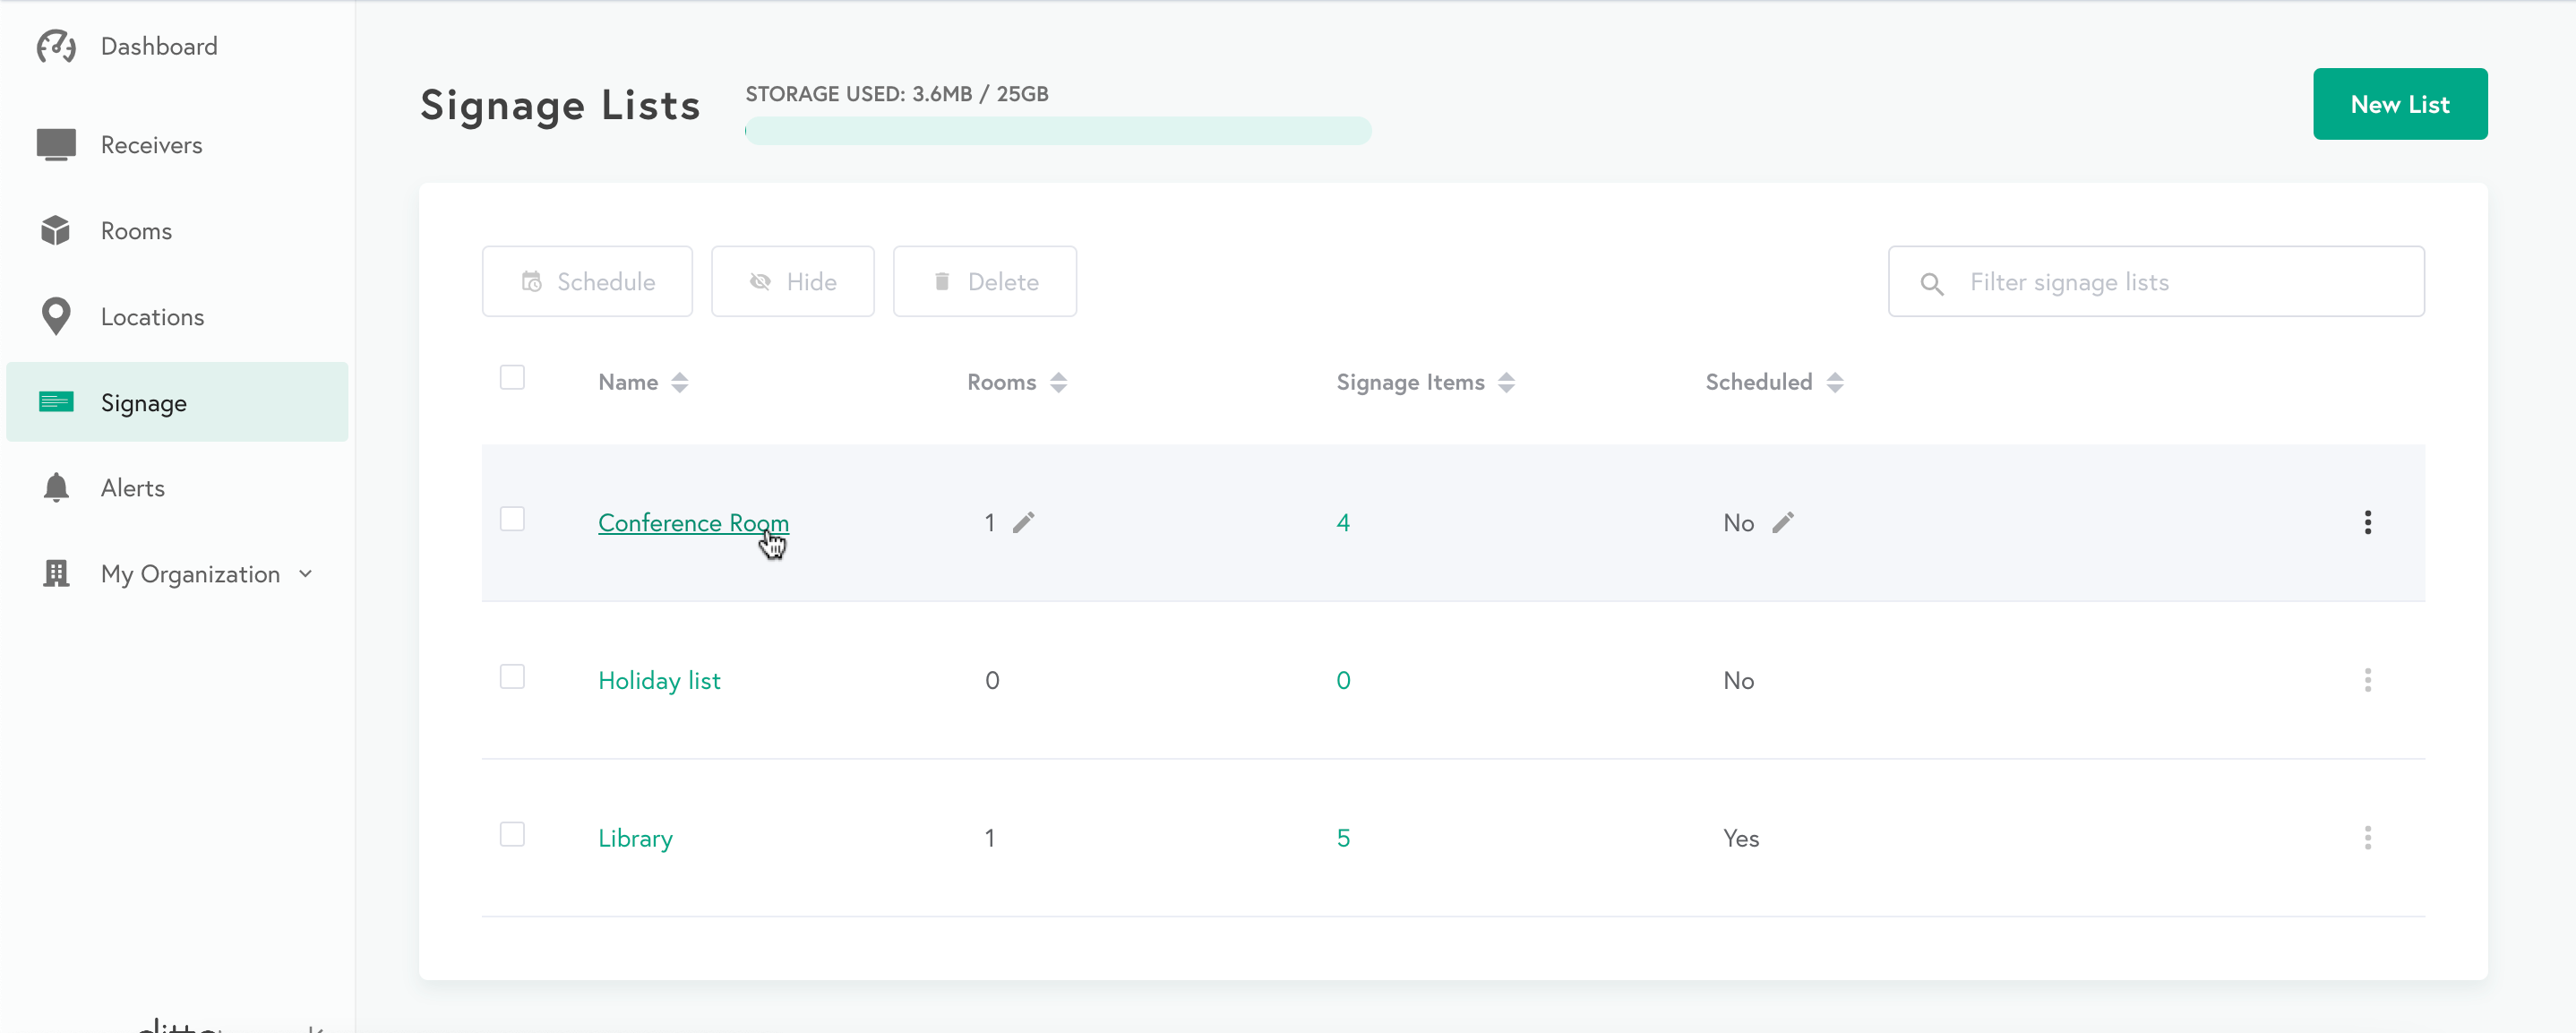
Step 3: Scroll down and enable the Schedule toggle switch
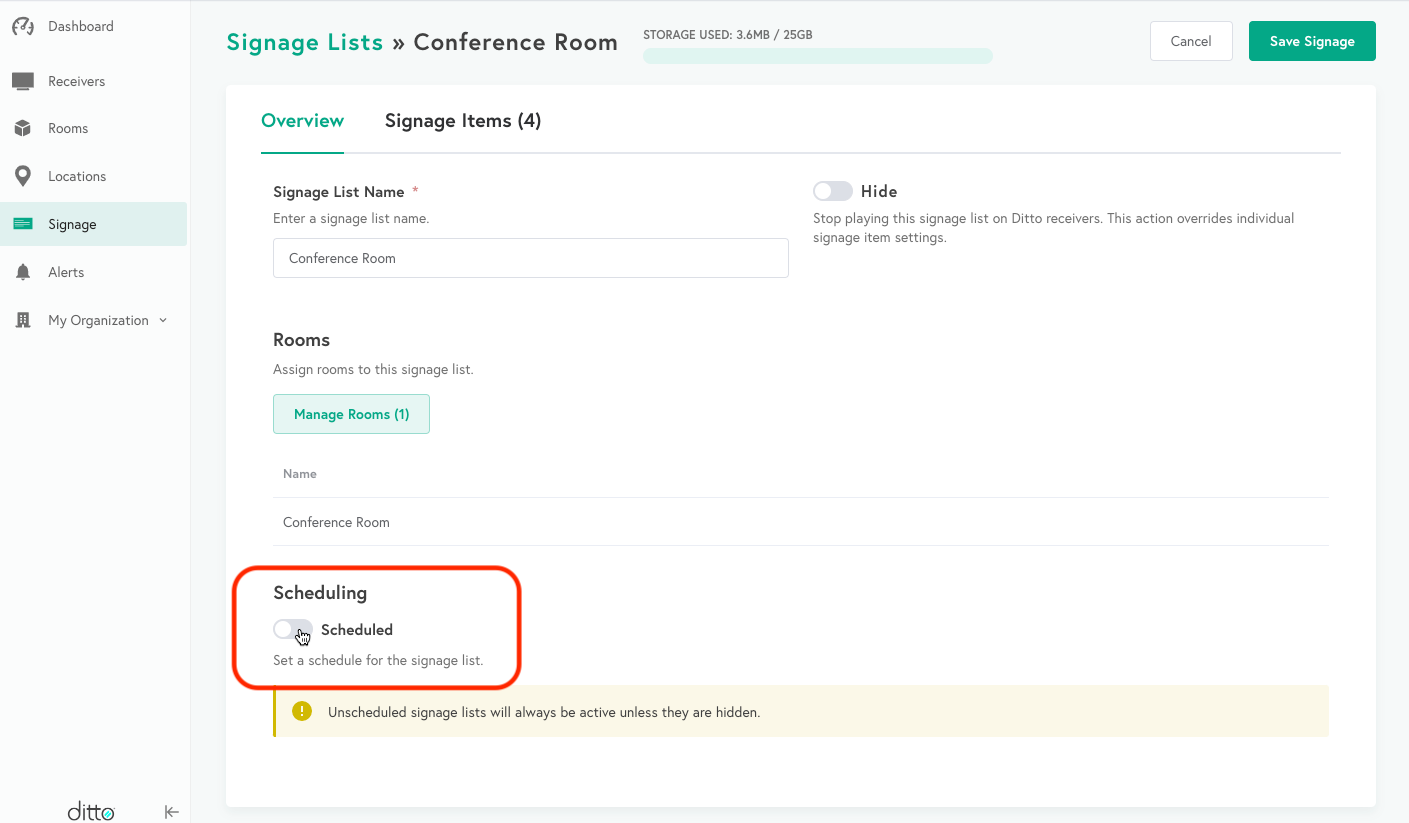
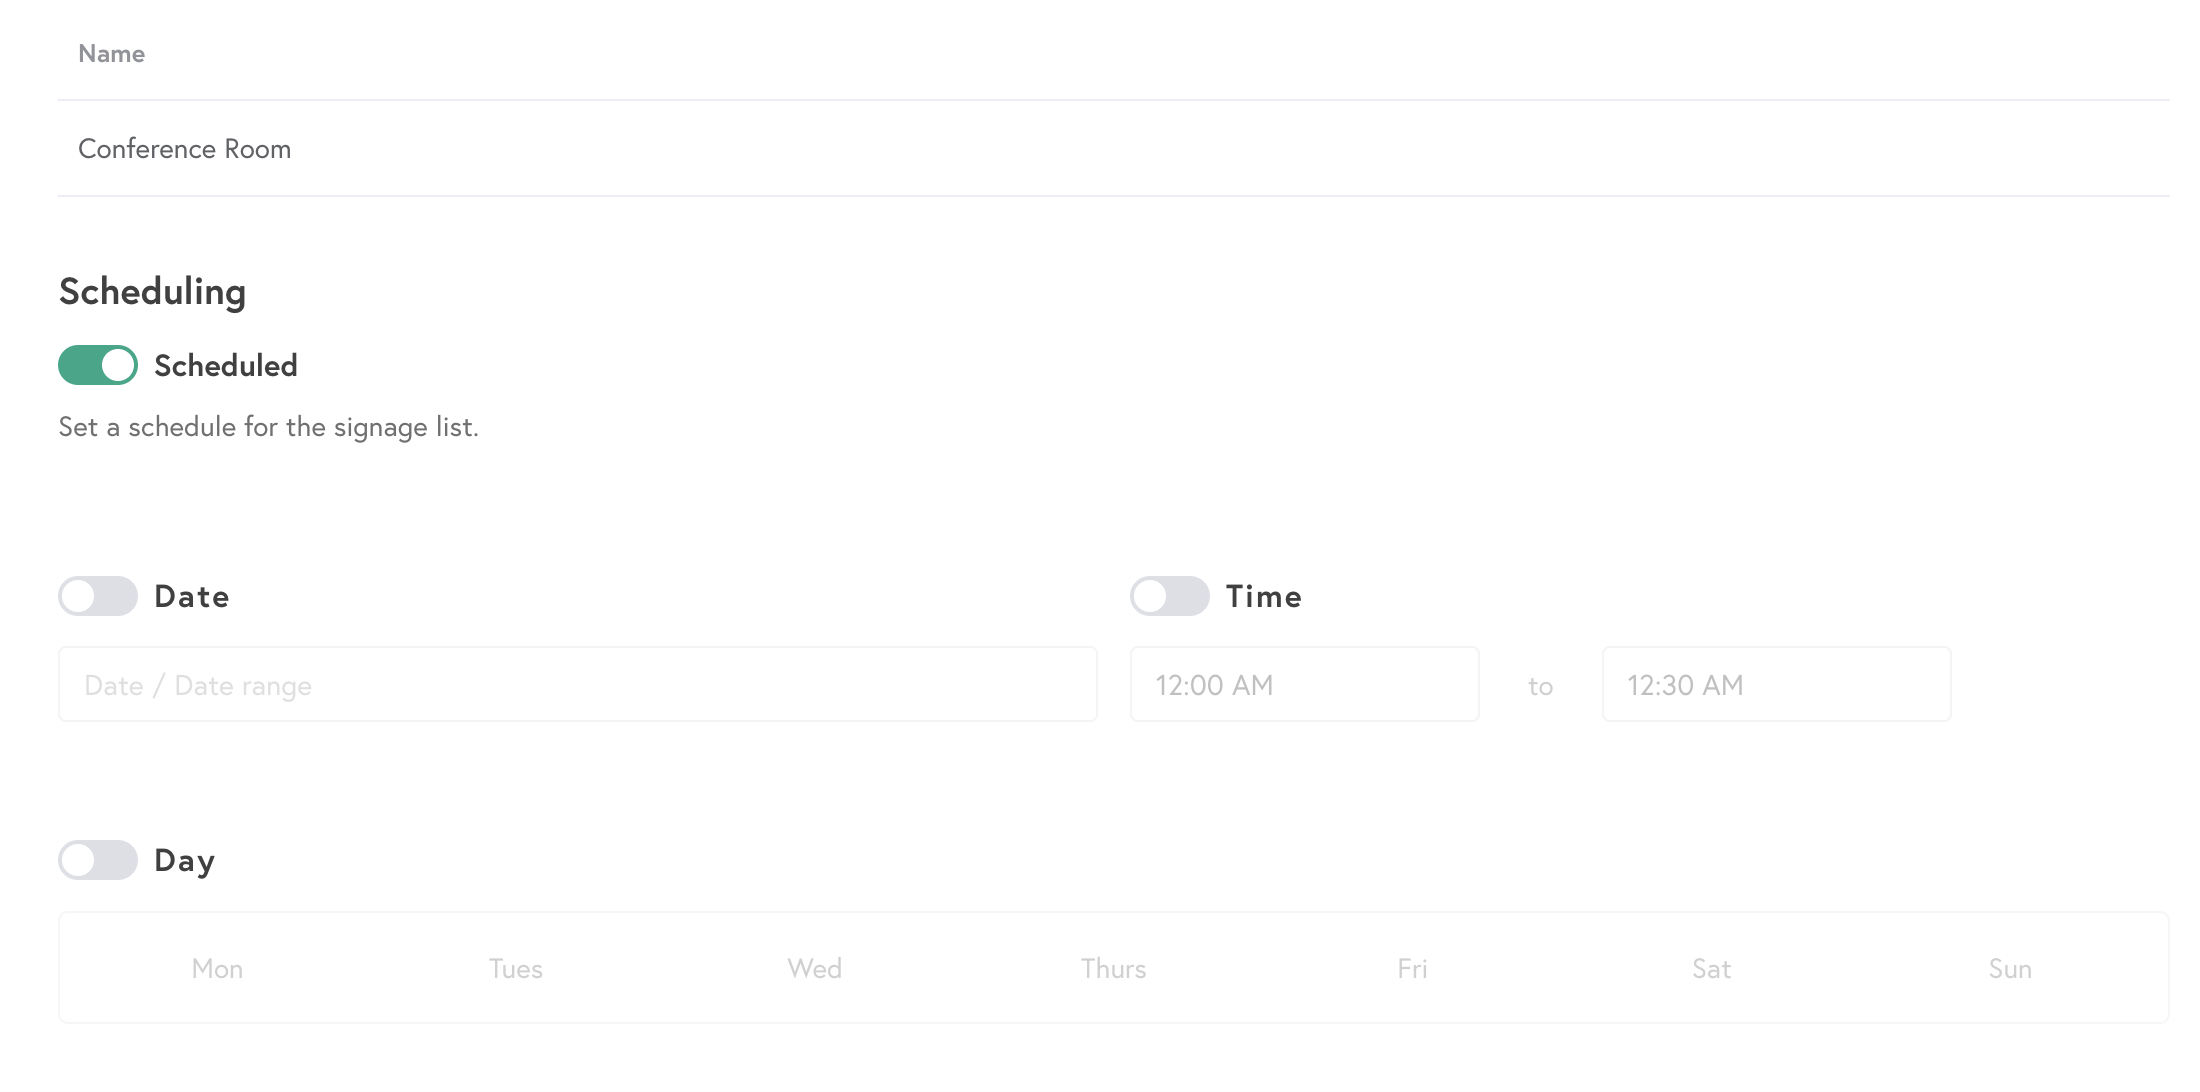
Step 4: Toggle the desired scheduling option for the list, edit the schedule, then select Save Signage.
Success!
The entire signage list will display signage items during the selected dates, time, and/or days.
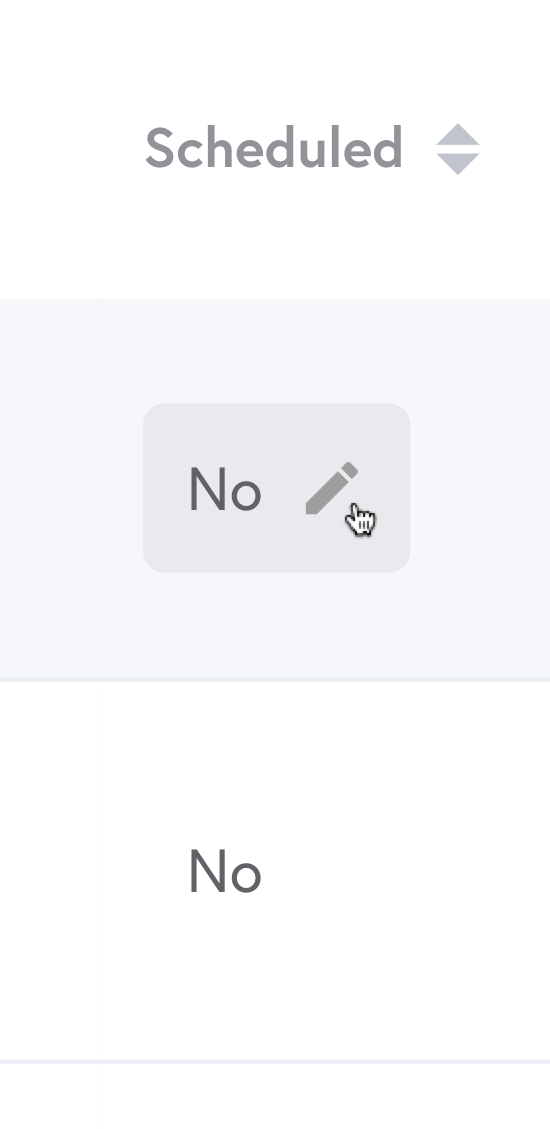
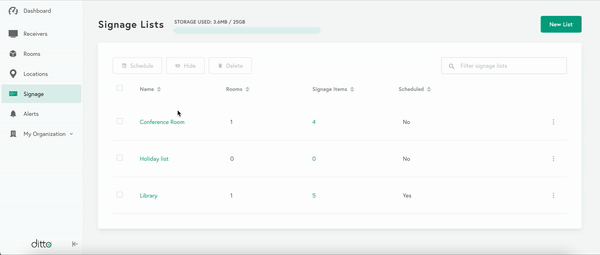
Option 2: Hover your cursor over NO in the scheduled column and click the edit icon
Step 3: Toggle the Schedule switch to enable the schedule options
Step 4: Toggle the desired scheduling option for the list, edit the schedule, then select Save.
Success!
The entire signage list will display signage items during the selected dates, time, and/or days.
Schedule multiple or individual signage items
Step 1: Log into the Ditto Account Portal and click the "Signage" tab
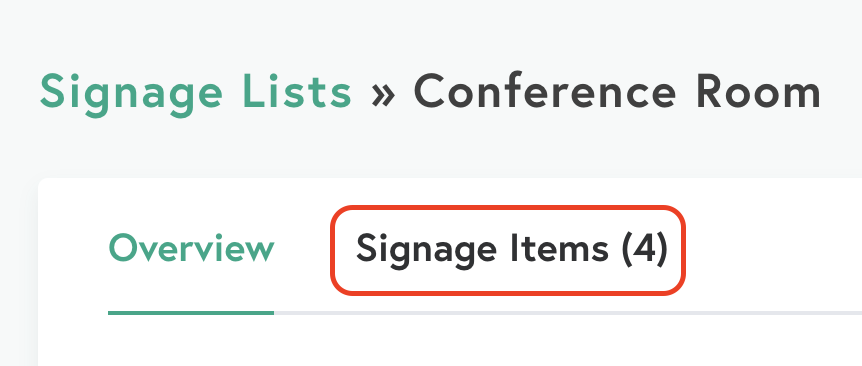
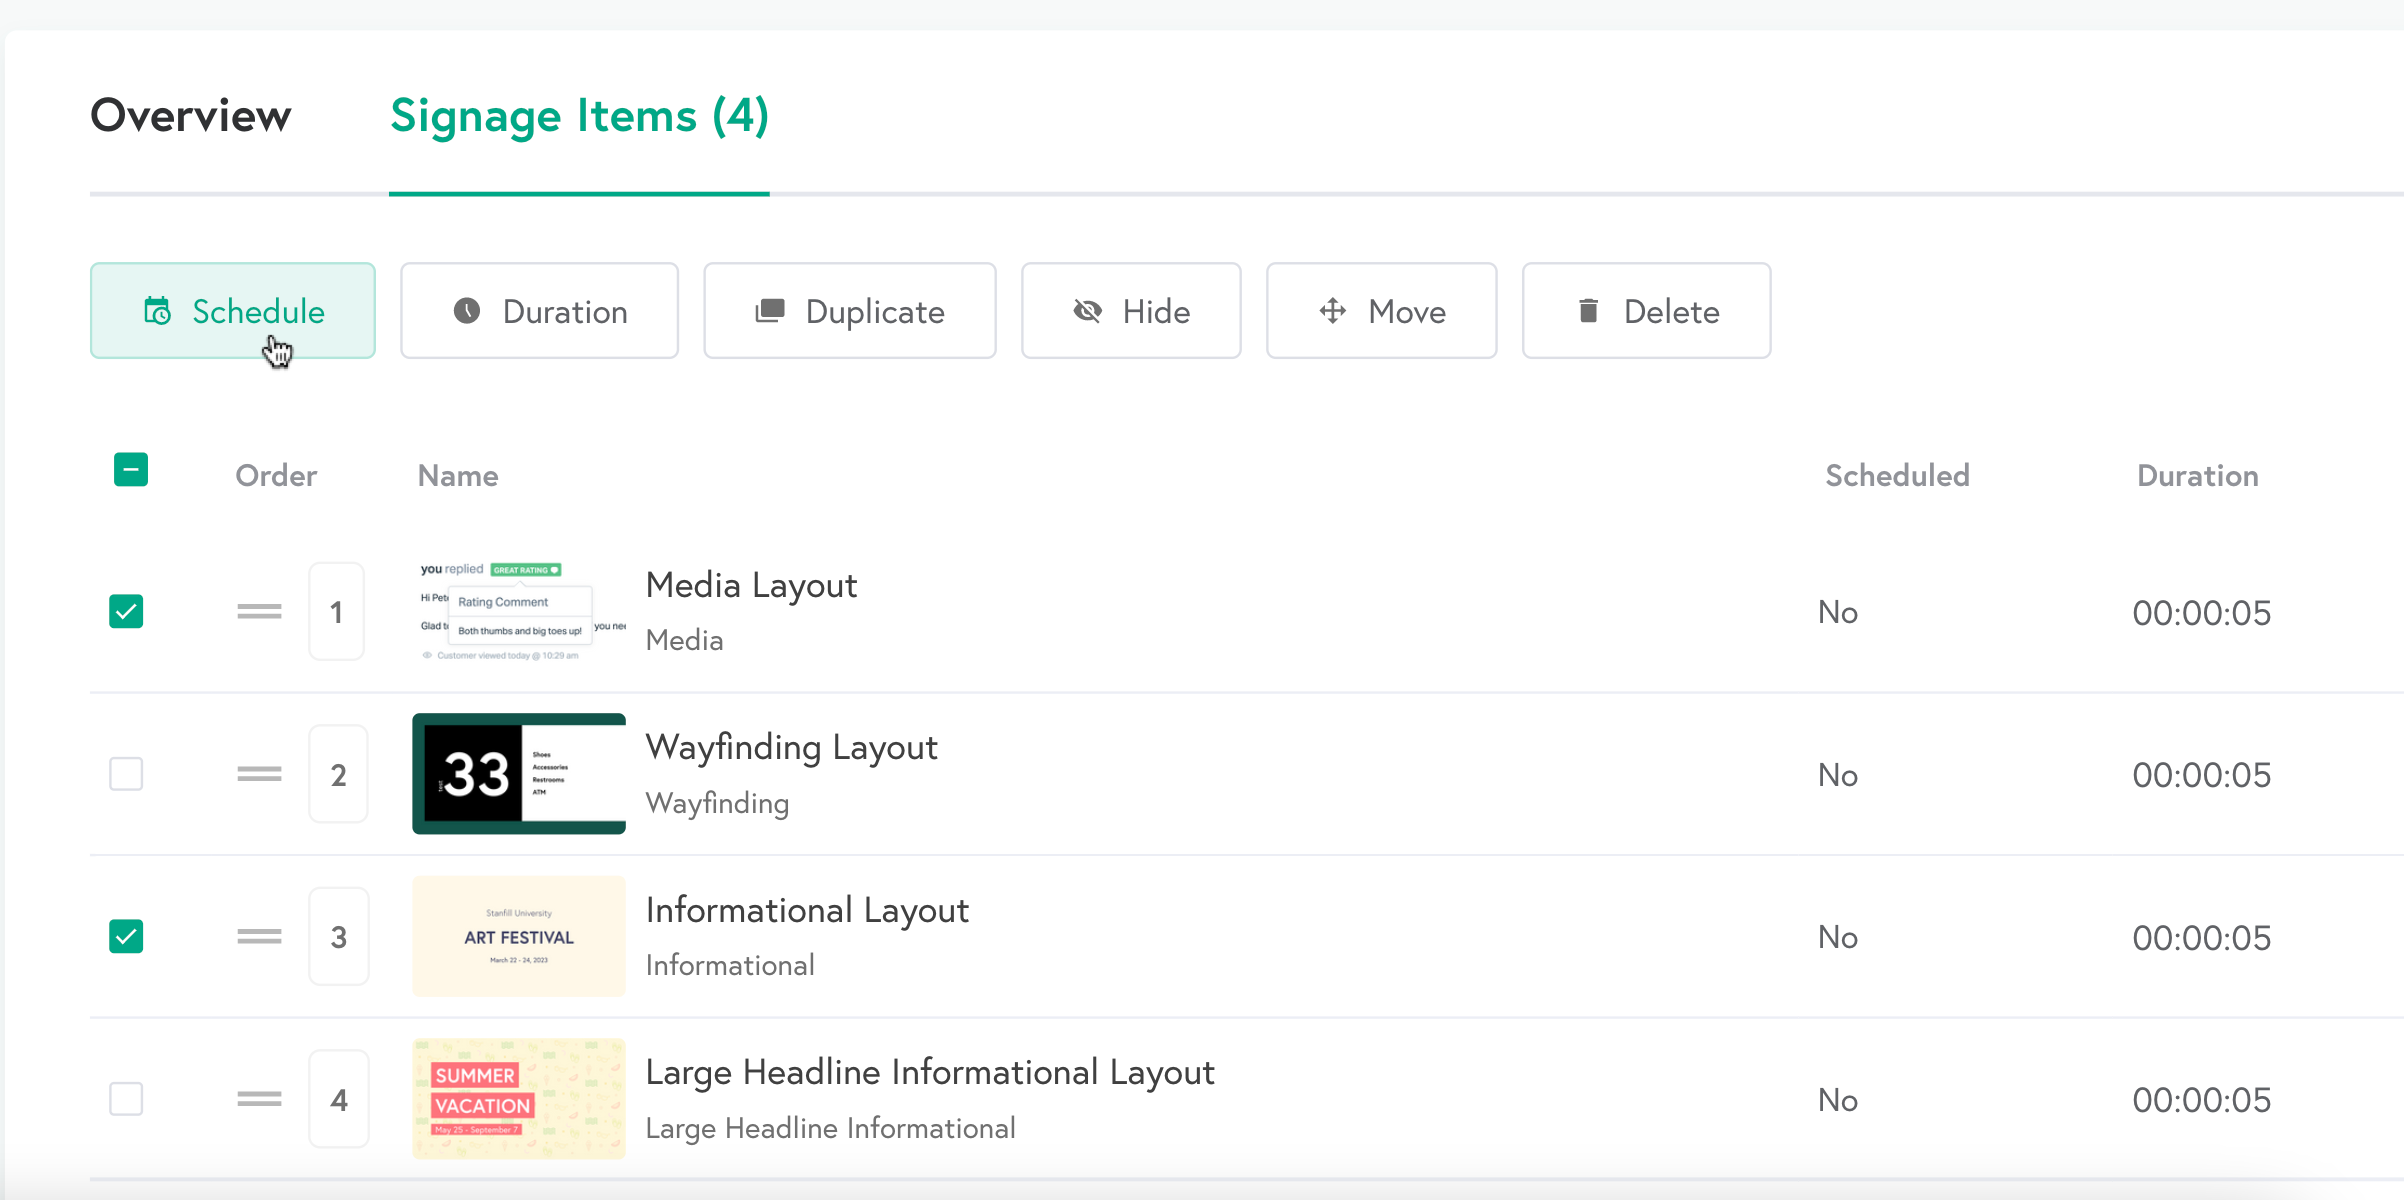
Step 2: Open a list and select the Signage Items tab
Option 1: Scheduling multiple items
Step 3: Select multiple items by checking the boxes then select Schedule
Step 4: Toggle the Schedule setting

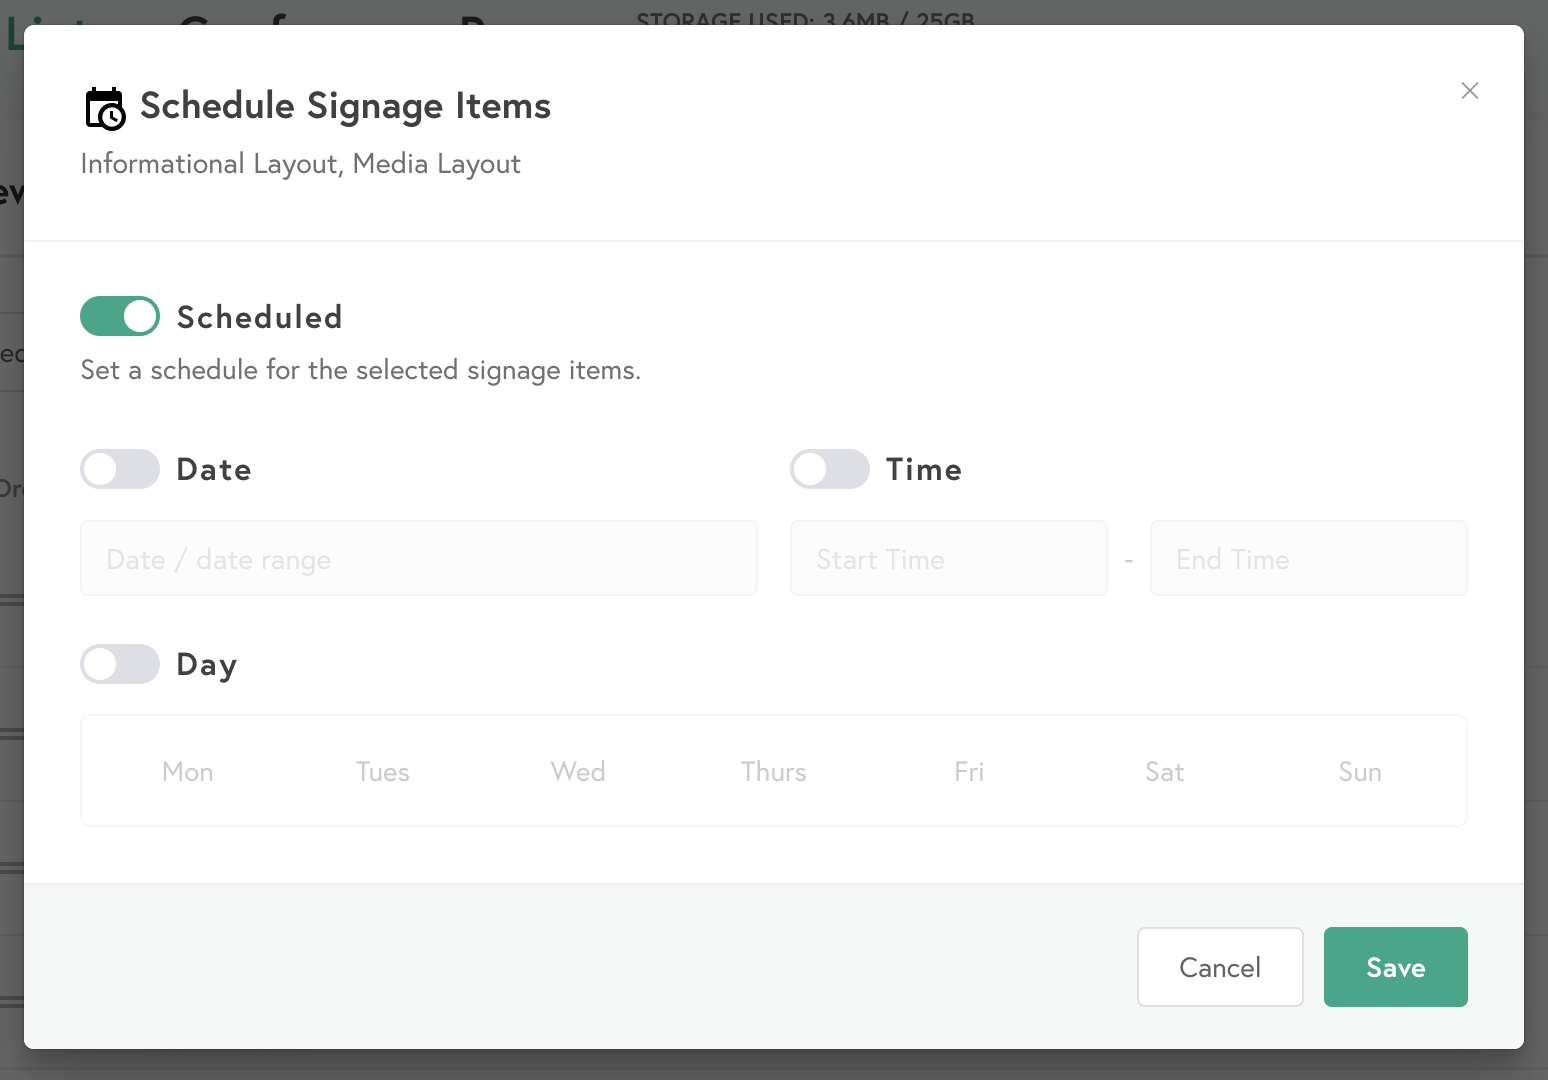
Step 5: Toggle the desired scheduling option for the list, edit the schedule, then select Save.
Success!
The entire signage list will now display signage items during the selected dates, time, and/or days.
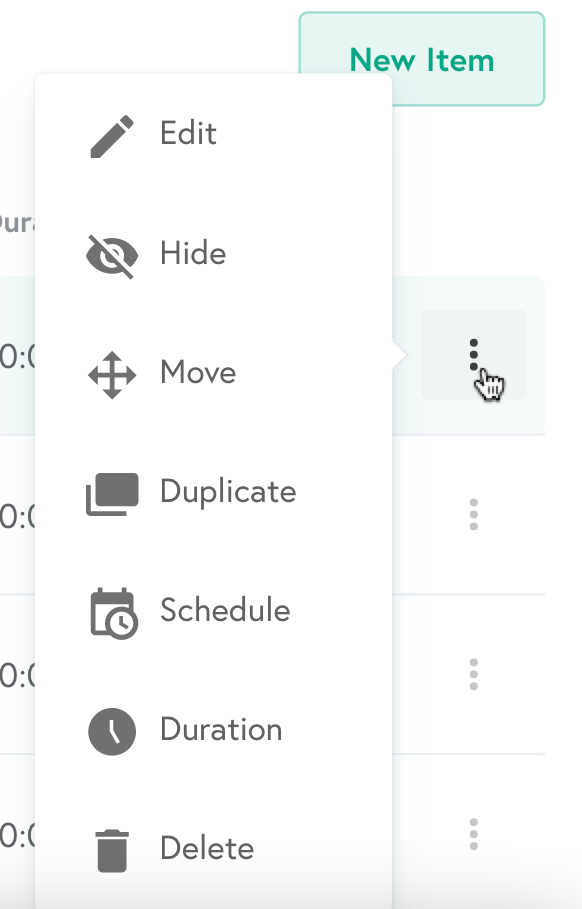
Option 2: Scheduling individual items
Step 3: Click the feature menu icon next to an item then select Schedule
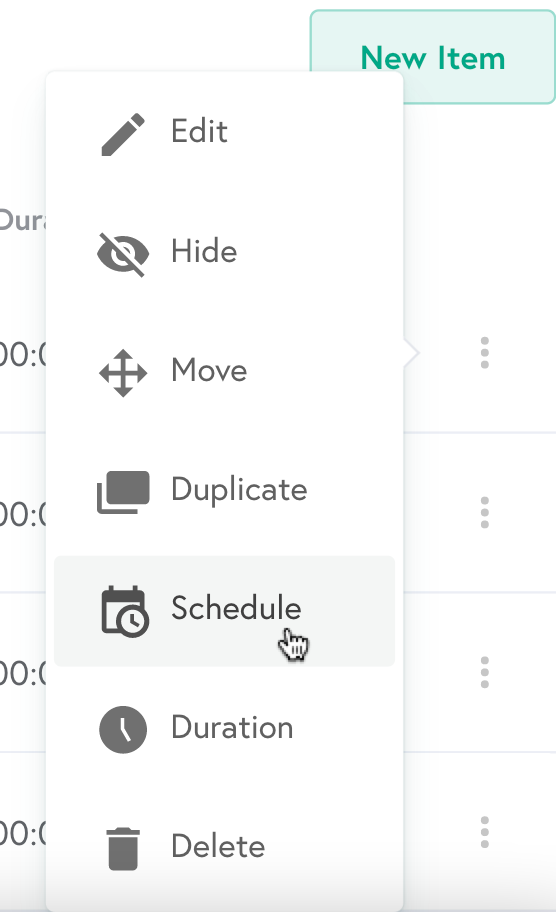
Step 4: Toggle the Schedule setting


Step 5: Toggle the desired scheduling option for the list, edit the schedule, then select Save.
Success!
The individual signage item will now display during the selected dates, time, and/or days.