Need to make an announcement on screens using Ditto digital signage?
Ditto admins and signage role users can create and schedule signage items on Ditto receivers for any occurrence, such as events, meetings, safety drills, etc. Use one of our customizable templates or upload your own custom content using the Media template to create your signage item.
There are two methods to create and display the scheduled announcement on Ditto Receivers:
Step 1
Log in to the Ditto Account Portal and click the "Signage" tab.
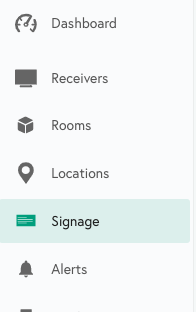
Step 2
Click “New List”
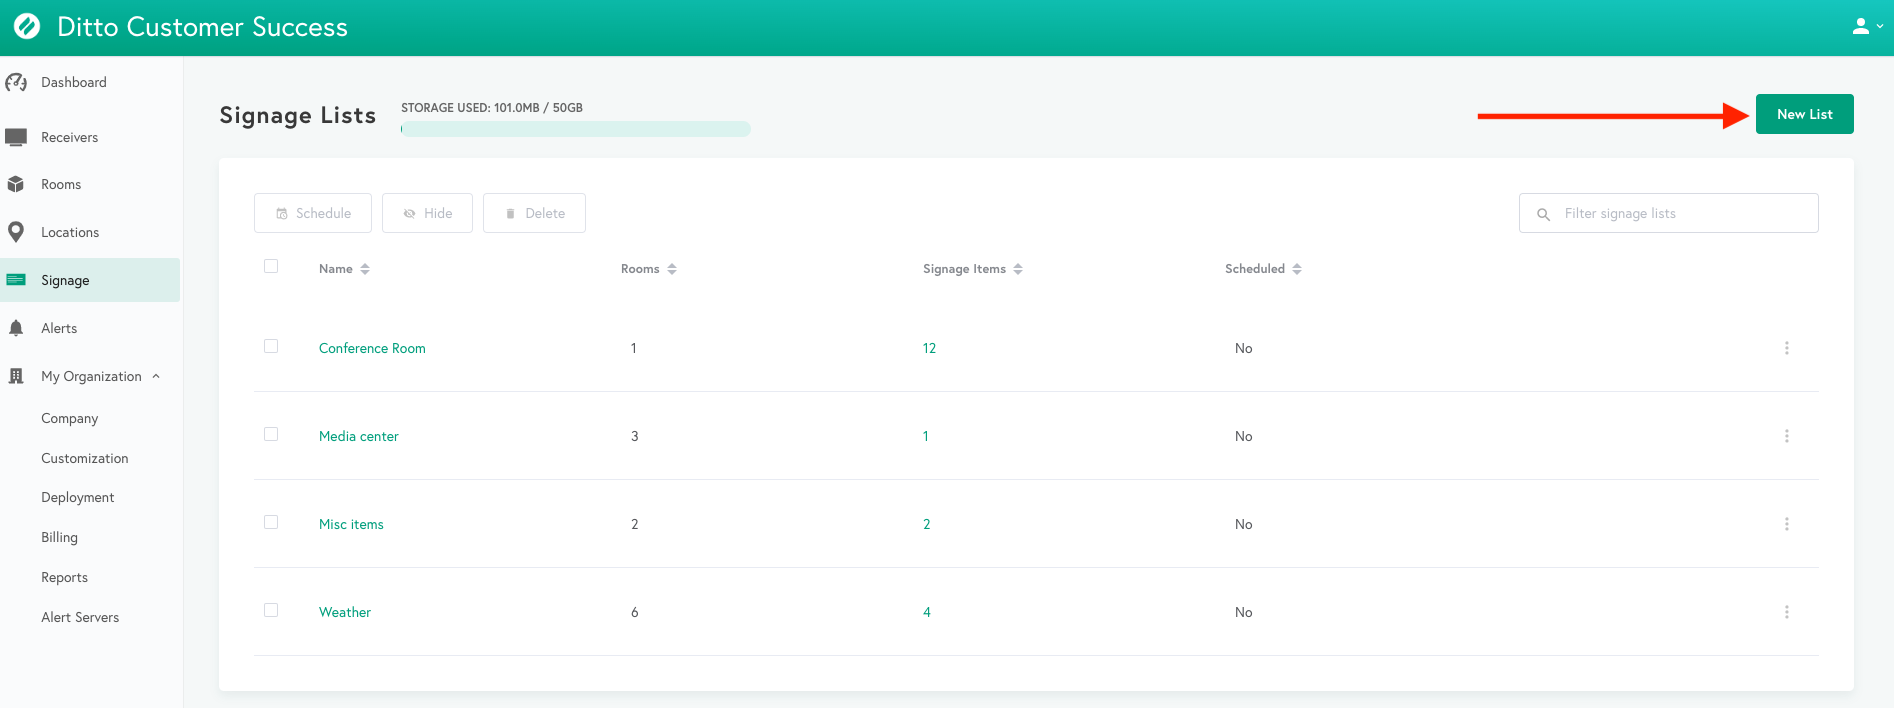
Step 3
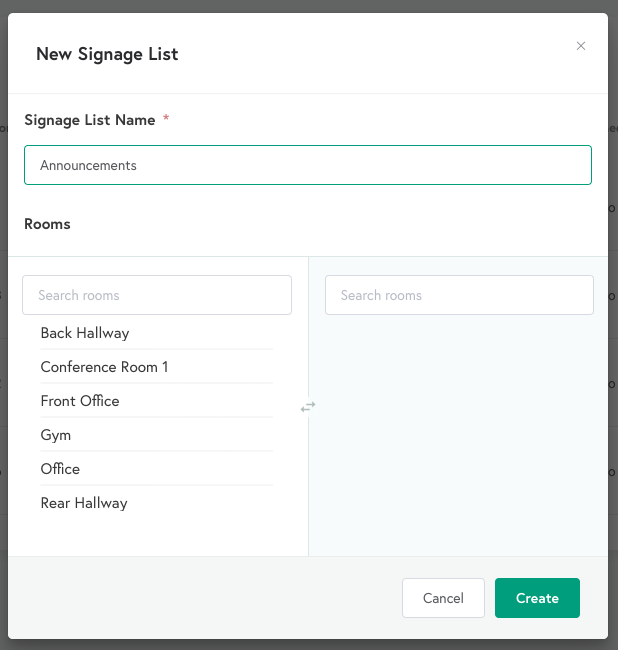
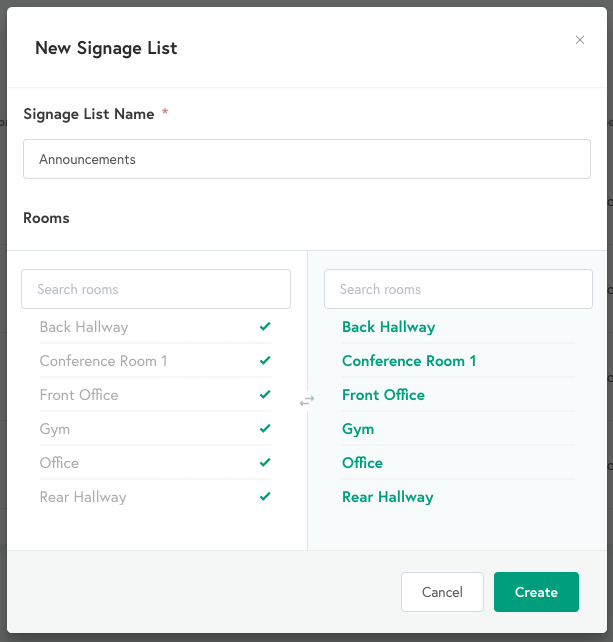
Add a name for the list and assign the list to your desired Ditto rooms.
Note:
- Users with a signage user role will be required to assign the new list to a Ditto room before the list can be saved.
- Ditto administrator users can create signage lists without assigning them to Ditto rooms.
Step 4
Click the newly created list in the Signage Lists menu.

Step 5
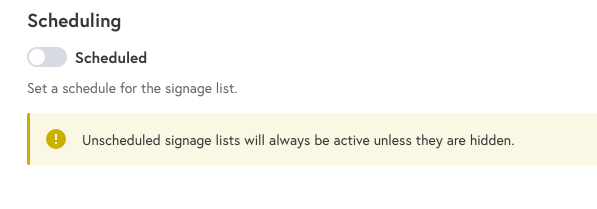
Scroll to the bottom of the Overview menu and enable the Scheduling function.
Note:
Scheduling from the Overview menu will apply the scheduling settings to every signage item in the signage list. Scheduling can be done for individual items in a list as well.
Step 6
Set the desired schedule for the signage list.

Step 7
Once your schedule is set, select the Signage Item tab, then New Item to add your signage item(s).

Step 8
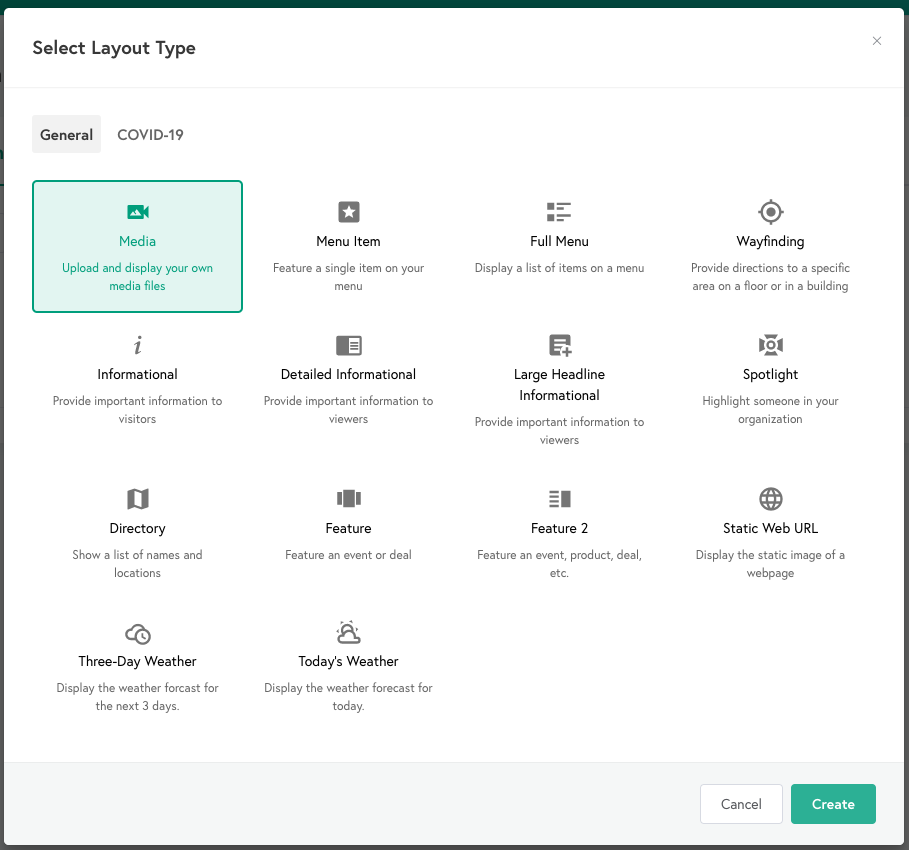
Select one of the provided templates to customize or use the Media template to upload a file.
Step 9
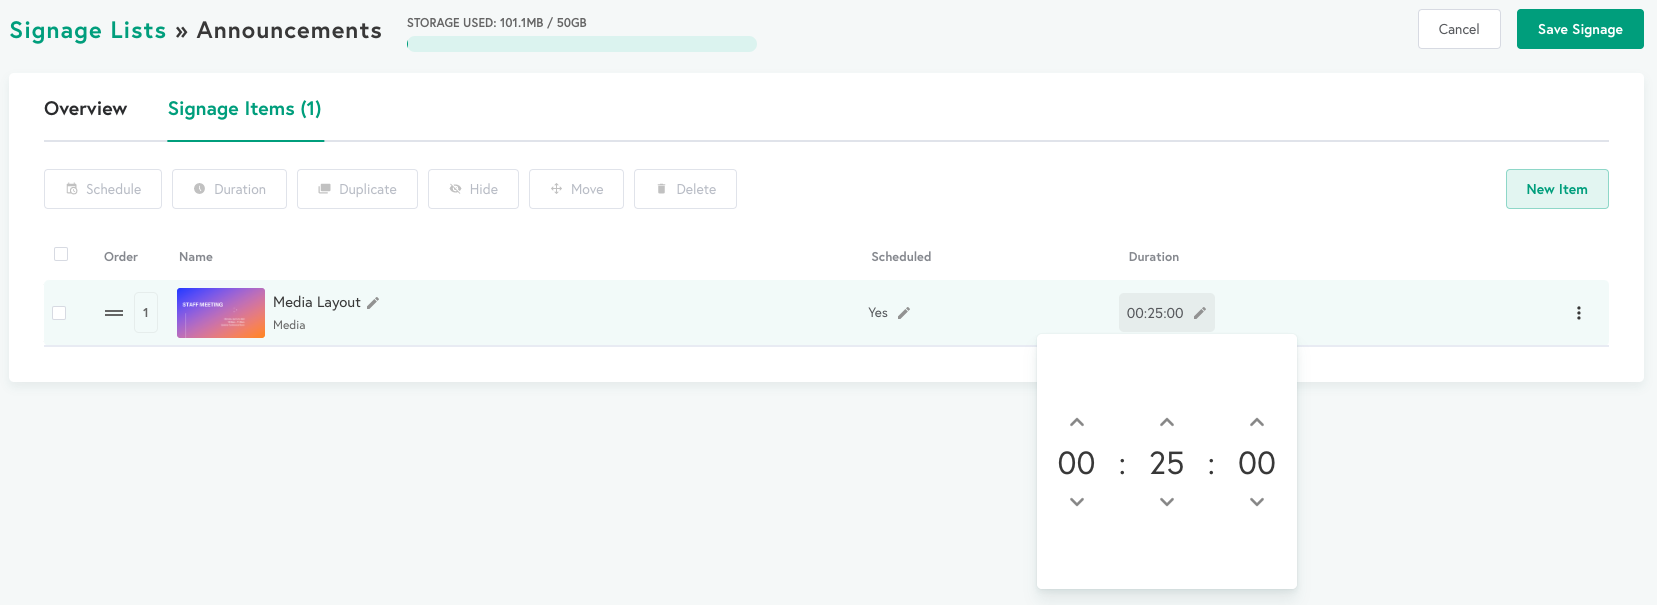
Edit the Duration of the item and extend the item's scheduled time so it will be the only item displayed on the Ditto receiver(s) during the time you want to run the announcement.
Congrats! Your announcement item(s) will now display on the desired Ditto receiver(s) during the scheduled time!
Step 1
Log in to the Ditto Account Portal and click the "Signage" tab.
Step 2
Select an existing signage list.
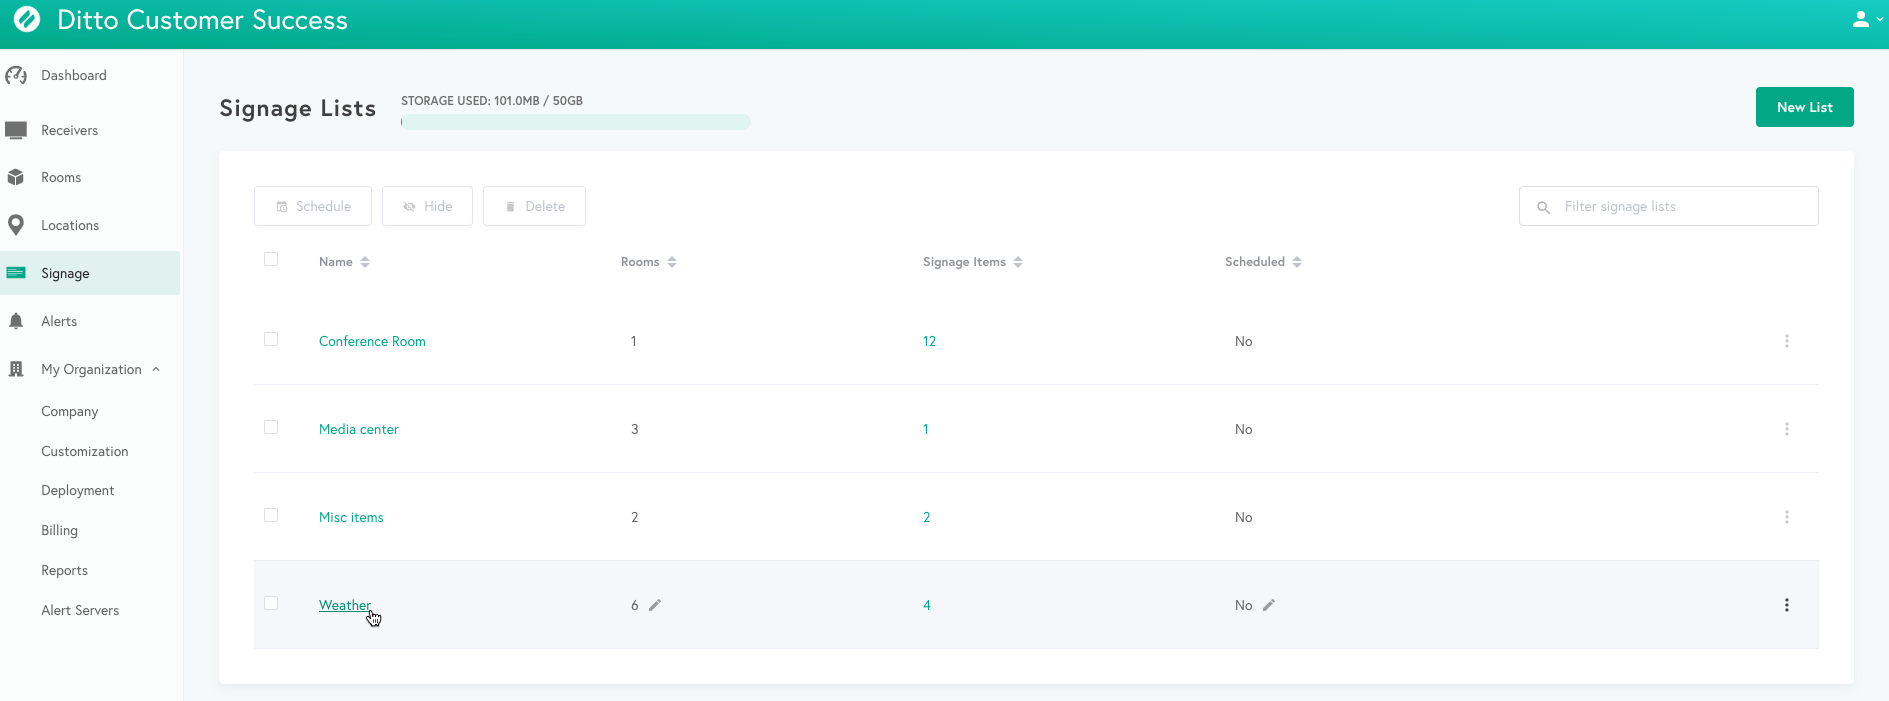
Step 3
Select the Signage Item tab, then select New Item.

Step 4
Select one of the provided templates to customize or use the Media template to upload a file.
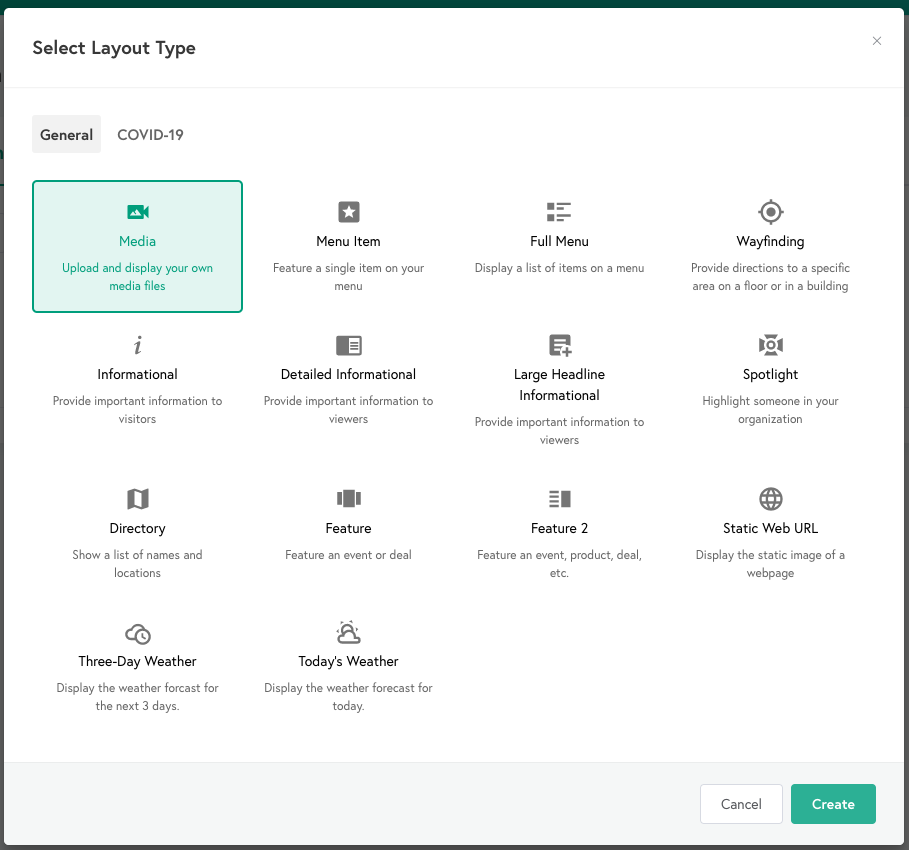
Step 5
Once your item is added to the existing list, select the edit icon in the Schedule column.
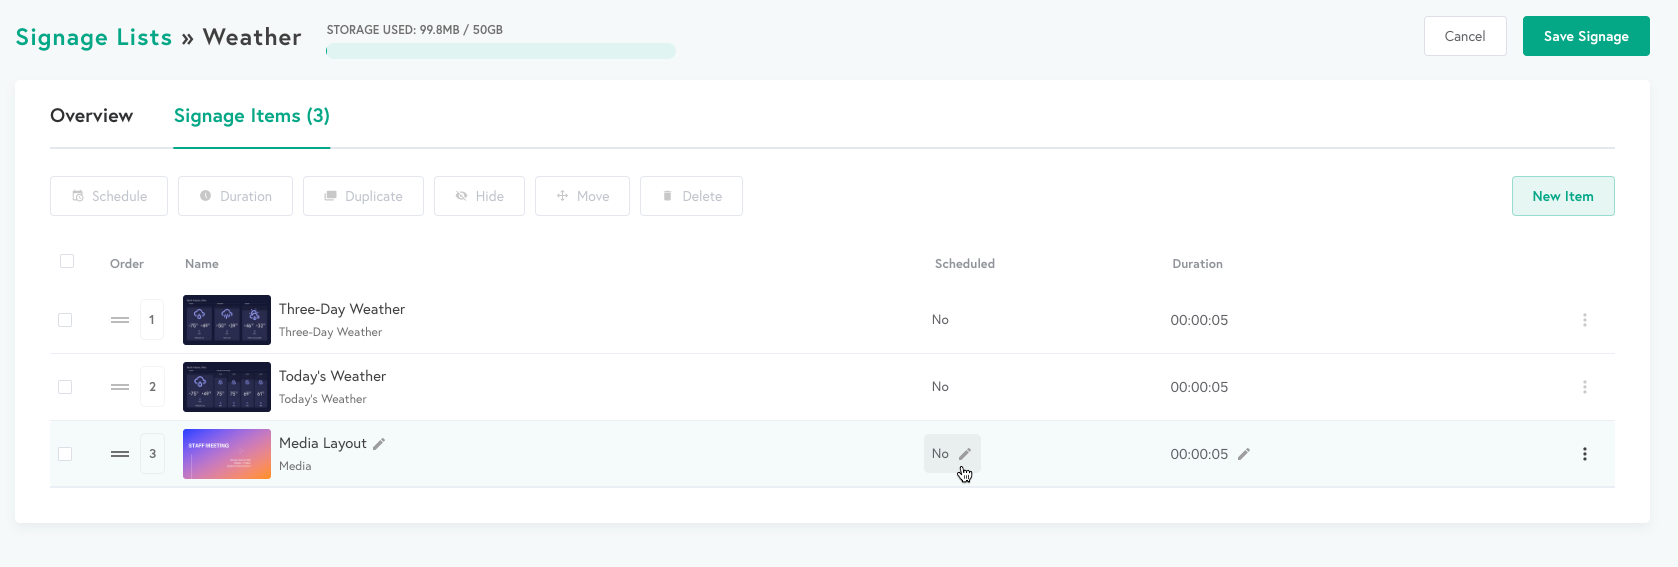
Step 6
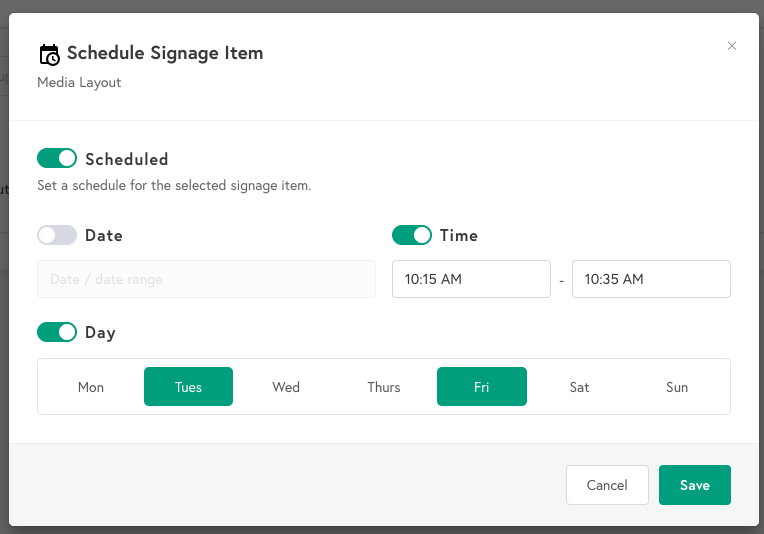
Enable the Scheduling setting, then set the desired schedule for the individual signage item and select Save.
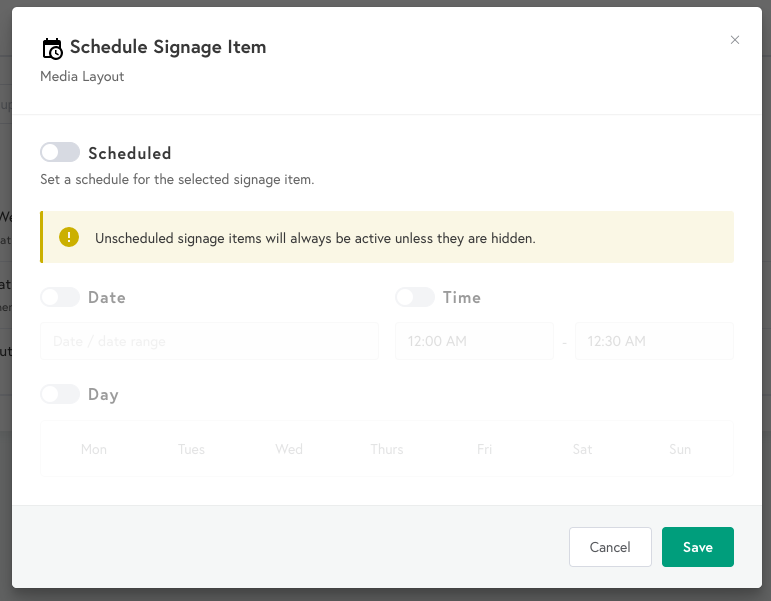
Pro Tip:
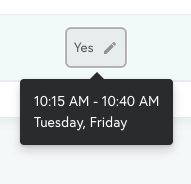
Hovering the cursor over the item in the Schedule column will provide a quick snapshot of the schedule for the item.
Step 7
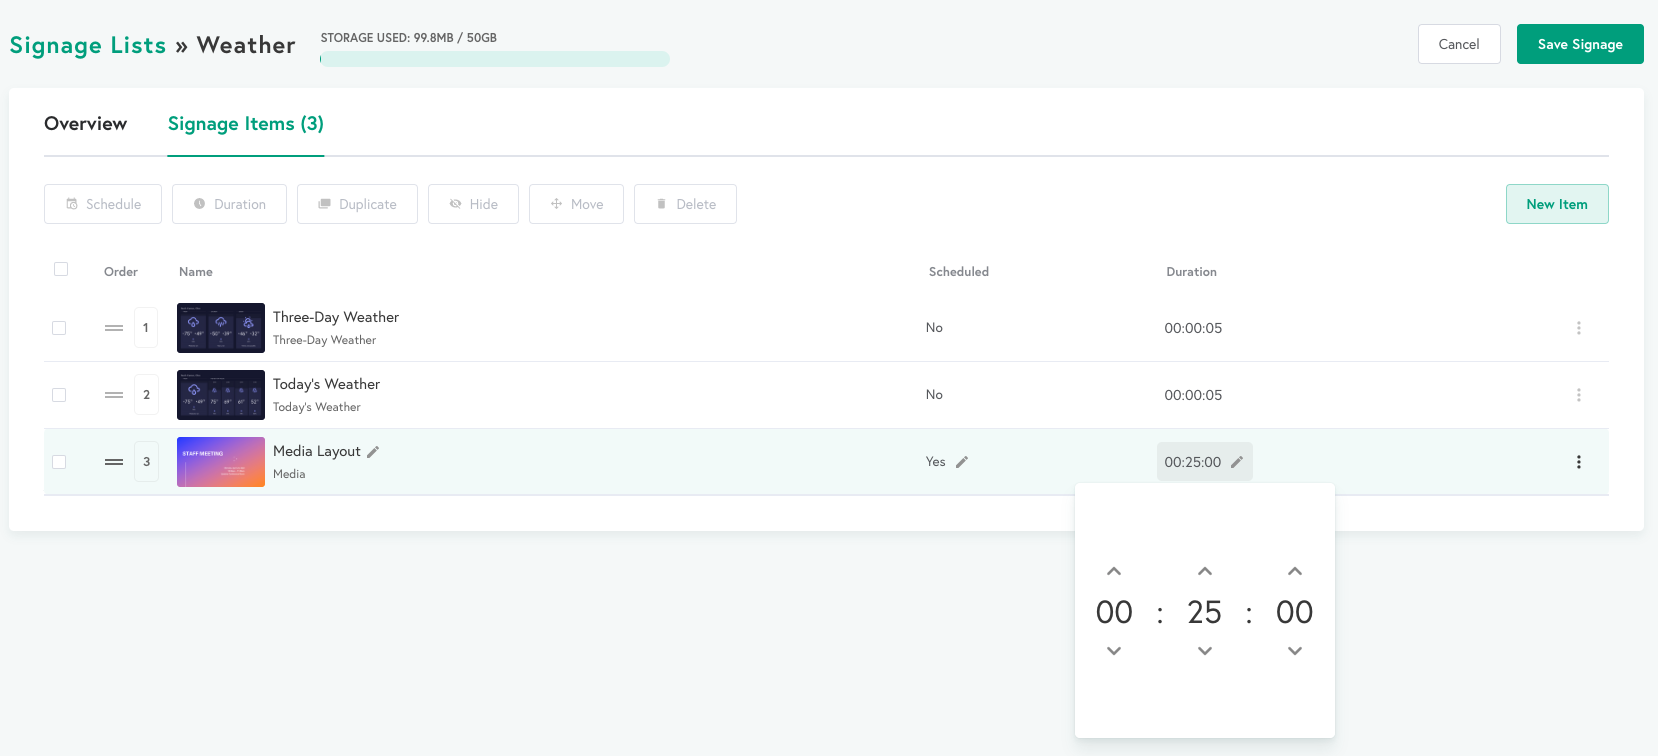
Edit the Duration of the item and extend the item's scheduled time so it will be the only item displayed on the Ditto receiver(s) during the time you want to run the announcement.
 Congrats! Your announcement item(s) will now display on the desired Ditto Receiver(s) during the scheduled time!
